Showing posts with label sweets. Show all posts

Monday, April 28, 2014

Oleo

I grew up with my mother sometimes referring to the sticks of Parkay and Blue Bonnet in our fridge as "oleo." An older lady we knew called it "oleomargarine," which a little online sleuthing tells me is the original name for a butter substitute developed in France using mostly beef fat and vegetable oils. Over time, it seems that the commercial recipe for margarine, as it came to be known, was altered several times due to availability of ingredients, but ultimately came to be made up of mostly oils.

As a kid, those sticks of oleo were whipped into cookies and baked into cakes. Tubs of the spread were slathered on toast and just plain old "bread and butter." It was what I knew and what, at the time, I liked. We didn't eat real butter in my childhood home; which now that I think about it seems a little odd since my mother also made weekly pilgrimages to an area dairy for fresh, whole milk for the her large family. But, that is probably a topic for another blog post.

Today, I came here to talk about oleo...and what it has come to mean to me. As an adult, my home has evolved into pretty much a butter only refuge. There are stray sticks of margarine that make their way into the house for a very select few recipes that benefit from the higher water content, but overall, 99.9% of our consumption is butter. I have come to prefer the flavor of real butter. Blame it on the marketing of the dairy council, but when I now hear the word "oleo," my mouth fills with the feel of grease. I don't want margarine. At all.

So, it was a little shocking (and honestly, as snobby as it may seem, a little revolting) when I saw a television commercial for a major drugstore brand of shampoo announcing its newest therapy for hair, Oleo Therapy. Umm...what?!? I know that beer, mayonnaise, eggs, avocados, olive oil, and recently, coconut oil have all been brought out of the kitchen as beneficial products for our follicles, but OLEO? I doubt that the product does actually contain margarine; who wants to smear I Can't Believe It's Not Butter on their head? But, seriously, is there nobody on the L'Oreal marketing team that remembers oleo as margarine? I don't get it. Oleo Therapy doesn't seem like a spa-quality product to me. It seems like a mouth full of grease. I won't be rushing out to treat my hair to Oleo Therapy.

I could possibly be rushing to treat myself to Graham Cracker Bars made with real butter. This is a slightly different take on the classic Saltine Toffee Bars. Graham Crackers are layered with toffee bits and almonds before being drenched with a syrup of melted REAL BUTTER and sugar. The bars are baked to a bubbly goodness and then topped with chocolate chips and flaked salt. Simple and delicious. Not a mouth full of grease. 
Graham Cracker Bars at On My Plate
Graham Cracker Bars
(adapted from Everyday Food)

13 graham crackers
1 bag (8 ounces) toffee bits
1 1/2 cups coarsely chopped toasted almonds
1/2 cup sugar
1 cup unsalted butter
3/4 cup semisweet chocolate chips
3/4 teaspoon coarse salt

Preheat oven to 350F. 
Line a baking sheet with foil. Arrange graham crackers in a single layer on sheet, edges touching. 
Sprinkle toffee bits and almonds over graham crackers.
Bring sugar and butter to a boil over medium-high. 
Reduce heat and cook at a rapid simmer, stirring occasionally, until mixture is syrupy, 2 minutes.
Immediately pour over graham crackers. 
Bake until sugar topping is bubbling, 12 minutes. 
Remove from oven and immediately sprinkle chocolate and salt over graham crackers. 
With a sharp knife or pizza cutter, cut into 2-inch squares.
Let cool completely. (Serves 24)

Monday, December 16, 2013

I Bet That Just Killed You

I have been doing a little holiday baking recently.

I know.

Every year, I tell you that I don't like to bake, but then I share a recipe for some delectably sweet baked good.

I am a conundrum.

But, here is the twist, one of the treats I find myself whipping up most every Christmas isn't actually baked. There is no oven involved in the recipe for Peanut Butter Bon Bons.  It came from my mother sometime in the early 80s, and I suppose you could call it semi-homemade because one of the ingredients is a tub of ready-to-spread vanilla frosting. When I recently shared that secret with a friend, she exclaimed, "I bet that just killed you."

Um...not.

I have no problem with taking a short cut here and there in the kitchen, as long as the end result is good. And believe me, Peanut Butter Bon Bons are good. So good that I can't imagine a Christmas without Peanut Butter Bon Bons On My Plate.


1 can ready-to-spread vanilla frosting
1 cup peanut butter
1/4 cup butter (I use unsalted.)
2 cups graham cracker crumbs (If I am crushing my own, I assume 1 package is 1 cup and do 2 in my food processor.) 
Chocolate candy coating for dipping
Candy decorations, if desired

Cream together frosting, peanut butter and butter until well combined.
Gradually add in graham crackers until fully mixed.
Using a small cookie scoop, portion the peanut butter/graham cracker mixture into 1-inch balls.
Roll the portions into 1-inch balls.
Chill for at least 1 hour or up to a day or 2.
Dip in melted chocolate candy coating.

Allow to dry on waxed paper for a few hours.

Saturday, November 02, 2013

Candy Bar. Skillet. Cookie.

Candy Bar
Candy Bar.

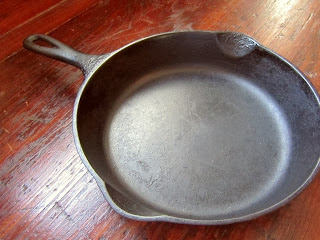
Cast Iron Skillet
 Skillet.

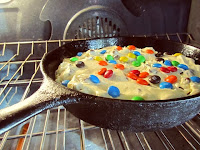
Candy Bar Skillet Cookie
Cookie.

(inspired by Picky Palate)

1 box (18.25 ounces) white cake mix
1/2 cup vegetable or canola oil
2 eggs
1 cup semi-sweet chocolate chips
6 fun-size Snickers candy bars
7 mini (bite-size) Milky Way candy bars
4 fun-size packages M&Ms

Candy Bar Skillet CookiePreheat oven to 350F. Combine cake mix, oil, and eggs to form a cookie batter. Stir in chocolate chips. Spray 10-inch cast iron skillet with cooking spray. Spread just over half of the cookie dough in the cast iron skillet. Arrange the candy bars and 2 packages of M&Ms over the cookie dough. Spread the rest of the cookie dough over the candy bars. Sprinkle the remaining 2 packages of M&Ms over the top. Bake for 45-50 minutes, until dough is baked through in the middle. Allow to cool completely before cutting into wedges to serve. (Serves 8.) 

Candy Bar Skillet CookieWARNING: Do not be tempted to overload with additional candy bars; the cookie will take much longer to bake through in the middle and then be dry.
Candy Bar Skillet Cookie

Saturday, October 26, 2013

An Apple a Day

If you live in South Dakota and have a television, you have probably seen a Golden West Telecommunications commercial. The candid shots of real South Dakotans going about their daily business and waving with friendly smiles reinforces that, in our state, we really all are neighbors and friends. There have been a few series of these televised spots with "characters" from all across the state.

The creative forces behind these ads are from Message, a full-service marketing and communications firm based in Rapid City, SD. I have been asked a few times to participate in shoots for Golden West spots, but always, there were scheduling conflicts. This past month, the "Messengers" were in our area and once again, contacted me. Although my calendar was full and my allergies were raging, I agreed and a time was set for filming me in my kitchen.

The day the crew was to arrive, I gave the kitchen a lick and a promise at cleaning and prepped a new recipe for Caramel Apple Oatmeal Cookies. I *big puffy heart* oatmeal cookies. Raisin Oatmeal may be my most favoritest, but Hubs would rather eat worms than look at a raisin. An oatmeal cookie with chunks of melted caramel and dried apples was perfect for fall and seemed to be just the thing to appease both of our taste buds.

It may be false advertising that I allowed myself to be filmed mixing up cookies and baking them. I am not a baker. I never have claimed to be, and honestly, I think that baking cookies can be one of my worst nightmares. However, little did I know that my worst nightmare was yet to come...

I should back up and explain that sinus issues have been my battle all year. Allergies flared up in the spring and never really loosened their grasp. I have been perpetually (chronically?) snotty, headache-y, whine-y for most of the year. Throw in a couple of subbing jobs at the school with exposure to kid germs, and a full on head and chest cold arrives that gobbles up boxes of tissues and makes my Hubs and the pups wince when I serenade them with a hacking cough. I have been, basically, a walking bucket of warm snot. And that is where my nightmare comes to life.

During the shoot in my kitchen, the crew chatted with me about others in the community that might be interested in participating, talked about my old house, and tried to make me laugh so that the shots of me smiling were real and warm and not as if I was constipated. At one point, I don't even know what the camera man said, but I snorted. Oh. Em. Gee. Yes. My nose wrinkled, my eyes squinted, and my allergy/cold congested head snorted. And...SNOT. CAME. OUT. OF. MY. NOSE.

I died.

I tossed aside the tray of cookies and dashed for the powder room and a tissue, but, it was too late. There is film of me with snot running out of my nose while snorting and laughing and holding a pan of Caramel Apple Oatmeal Cookies. It could become part of a Golden West commercial. This could very well be my worst nightmare.

Maybe I should have been eating an apple a day to keep the snot away, or at very least made Caramel Apple Oatmeal Cookies earlier. They do have apples; it might have helped.


(adapted from Cooking Light)

1 1/2 cups flour
1 1/2 cups oatmeal
1 teaspoon baking powder
1/2 teaspoon baking soda
1/2 teaspoon salt
3/4 cup sugar
3/4 cup brown sugar
6 tablespoons unsalted butter, softened
2 teaspoons vanilla extract
1 large egg
3/4 cup finely chopped dried apples (I used apples that I had dehydrated and were very dry. Therefore, I added a splash of water to the chopped pieces and let set for a bit before stirring into the dough. I think it made for a chewier cookie...my preference.)
3/4 cup caramel bits OR 16 small soft caramel candies, chopped (I opted to chop the caramels. The caramel bits were quite hard and I wanted softer, chewier cookies. I tossed my chopped caramel bits with just smidgen of flour to keep them from sticking together.)

Preheat oven to 350F.
Combine sugars and butter in mixing bowl and beat until light and fluffy.
Add vanilla and egg, beat well. 
Mix in the flour, oatmeal, baking powder and soda, and salt just until combined.
Fold in the caramel bits and dried apples.
Drop by 2 teaspoonfuls 2 inches apart on baking sheets lined with parchment (or Silpat).
Flatten balls slightly. (I pressed with the bottom of a measuring cup.)
Bake at 350F for 9 minutes.
Cool on pans for about 2-3 minutes.
Remove from pans and cool completely on wire racks. (4 dozen cookies)

Monday, July 09, 2012

Independence

I had planned to share this recipe for the Fourth of July. Time got away from me before the holiday, but when I tucked into bed and shut my eyes on July 3rd, I thought I would have a little time to get this posted here on the blog on the fourth.

Then on July 4th, I awoke a little after 5am to find an intruder in my house. In! My! House! He was drunk/high and out of his mind with hallucinations that he had to retrieve someone or something from my front closet. Thankfully, he was neither destructive, nor aggressive, and willingly left when I told him to (in my best unpleasant substitute teacher voice). The Sheriff's department caught him a few blocks away.

Wild way to start Independence Day, huh? Things like this just don't happen in our small town of 300ish people, and needless to say, it has caused a little uneasiness among our residents. Doors are all locked now...and double checked.

Anyway, enough of the crazy what-is-this-world-coming-to-ness. I don't have to be home alone and kicking out an intruder to declare my independence. I can do it with a delicious dessert. I think I have mentioned previously that Hubs isn't a fan of peaches. I am a fan. A big fan. Therefore, baking a pan of scrumptious sweetness is my declaration of independence.

Peach and Blueberry Cobbler screams summer for me. I love the contrast of the tart, juicy peaches and plump, sweet blueberries. It is the kind of old-fashioned dessert you expect to happen in a small town for the Fourth of July. (And, don't believe for one minute that Hubs didn't eat several warm servings with scoops of creamy vanilla ice cream.)

Three plates and forks: 
one for me,
one for Hubs,
one for whatever gremlin the intruder thought was in my closet.

(adapted from Cooking Light)

5 pounds peaches, peeled, pitted, and sliced
juice of one lemon
1 cup sugar, divided
3/8 teaspoon salt, divided
1 1/2 cups, plus 2 tablespoons flour, divided
1 teaspoon baking powder
1/2 cup butter, softened
2 large eggs
1 teaspoon vanilla
3/4 cup buttermilk
2 cups fresh blueberries
2 tablespoons turbinado sugar


Preheat oven to 375F.
Place peaches in a large bowl with lemon juice, 3/4 cup of sugar, 1/8 teaspoon of salt, and 2 tablespoons flour; toss to coat.
Coat a 9x13 glass pan with cooking spray.
Arrange the peach mixture evenly in the pan.
Combine 1 1/2 cups flour, 1/4 teaspoon salt, and baking powder in a bowl.
In the mixing bowl, beat 1/4 cup sugar and butter until light and fluffy.
Add eggs and vanilla extract.
Add flour mixture and buttermilk alternately to butter mixture.
Beat just until combined.
Fold in blueberries by hand, taking care not to crush.
Spread batter evenly over peach mixture.
(This is where I ran into a snag. My dough was too thick to spread. I dropped by spoonfuls to cover the peaches, and gently pulled them together on top with a rubber spatula.)
Sprinkle with turbinado sugar.
Bake at 375F for 1 hour, or until topping is golden and filling is bubbly. (Serves 12)

Thursday, April 05, 2012

Hop to It

Do you have a dessert for your Easter menu?

No?

If you aren't chocolated out by Cadbury Eggs, I have the perfect solution.

Milk Chocolate Banana IceBox Cake.

Hop to it.


15 ounces milk chocolate, chopped (I had 2 of those LARGE Hershey Bars with Almonds...which were 16 ounces, but oh well.)
5 large egg yolks
3 cups heavy cream
20 graham crackers
4-5 ripe bananas, sliced 
Garnish: whipped cream and chocolate shavings
Place chocolate in a heat-proof bowl.
Place yolks and a pinch of salt in another heat-proof bowl.
Bring cream to a simmer in a medium saucepan. (simmer, NOT boil)
Slowly pour cream into bowl with yolks, whisking constantly.
Return to saucepan over low heat.
Cook, stirring constantly, until mixture is thickened, about 8 minutes. (Mixture should not boil.)
Immediately strain through a fine sieve set over chocolate.
Stir until chocolate melts and is smooth. (Whisking works best.)
Refrigerate until thick, about 4 hours.
Line a 5-by-10-inch loaf pan with plastic wrap.
Spread 1 cup chocolate mixture evenly into bottom of loaf pan.
Top with a layer of 4 graham crackers, trimmed to fit.
Spread 1/2 cup chocolate over tops, and cover with some bananas.
Spread 1/2 cup chocolate over bananas, and top with a layer of 4 trimmed graham crackers.
Repeat with remaining chocolate, bananas, and graham crackers until the pan is filled.
Finish with graham crackers.
Cover with plastic wrap and refrigerate OVERNIGHT.
Uncover, and turn out onto a serving platter. 
Remove plastic wrap.
Garnish with whipped cream and chocolate shavings.
Cut into slices to serve. (Serves 8 to 10)
**NOTE**I didn't measure my layers of chocolate pudding exactly and didn't need all 20 graham crackers and only had one layer of bananas (about 2 whole bananas). I have presented the ingredients exactly as stated in the magazine, but you may need to alter them if you wing it like I did.

Saturday, February 18, 2012

Caught in the Act

Oreos have traditionally represented happy childhood memories. However, I can't look at an Oreo without thinking about my husband...naked.

I am sorry. I know you didn't come here for *those* kinds of tales, but trust me. This is legend.

As a farmer, Hubs usually finds himself as busy as a one-man-band. Chores are a never-ending battle, as are repairs. A leisurely day is treasured, almost held sacred. Back when we were mere newlyweds, one mid-summer Sunday morning began just as that type of day.

Always an early riser, my husband had showered long before my tired soul had dreamt of venturing from under the covers. What took place next is a bit foggy in our memories. The tale varies slightly with each re-counting; however, the facts remain the same. After showering, Hubs, for a reason not yet disclosed, proceeded to saunter through the house naked, without a stitch of clothing, modesty unheeded.

Feeling a need for nourishment, he selected not cereal, not eggs, not toast or even fruit, but Oreos. Then, he settled himself, still naked, in front of the TV.

Sometime later, I emerged from my slumber. Pulling on my robe, I stumbled groggily to the living room, just in time to see my husband's childhood pal pull into the drive. Announcing our guest's arrival, I noticed my husband's attire, or lack thereof.

Not fully awake, I instructed Hubs to remain in the chair. Meanwhile, Sam, the friend, had bounded from his car and was rapidly approaching the door. Hubs shot me a look which confirmed the insanity of my request and grabbed the Oreos. He dashed to the bedroom, leaving behind a tell-tale trail of Oreo cookies all the way down the hallway.

When questioned as to motive, Hubs simply stated it was freedom of expression. He can eat Oreos in the nude on any Sunday morning he wished. After all, it is a free country. *eye roll*

Zucchini Oatmeal Sandwich cookies are more like Little Debbie Oatmeal Creme Pies than Oreos, and you could eat them while sitting naked in your favorite chair watching TV, but you certainly don't have to. In fact, I even think I would prefer not to know if you do. OK? Unless it is a really great story of getting caught in the act...maybe.


(adapted from Martha Stewart)

3/4 cup unsalted butter, room temperature
1/2 cup sugar
1/2 cup packed brown sugar
1 egg
1/2 teaspoon vanilla extract
1 cup flour
1 1/4 teaspoon cinnamon
1/2 teaspoon baking soda
1/2 teaspoon baking powder
1/4 teaspoon salt
1 cup finely grated zucchini
1 cup old-fashioned oats
8 ounces cream cheese, room temperature
1 cup powdered sugar

Preheat oven to 350F.
Beat 1/2 cup of the butter (save remaining 1/4 cup for cream cheese filling) and sugars until pale and fluffy.
Beat in egg and vanilla.
Add flour, cinnamon, baking soda, baking powder, and salt.
Mix in grated zucchini and oats.
Refrigerate until firm, about an hour.
Using a medium cookie scoop (I might have used a small...I only have one.), drop dough onto parchment-lined baking sheets (I used Silpat and had problems with sticking. I think the parchment is essential.), spacing about 2 inches apart.
Bake until edges are golden, about 17 minutes.
Allow to cool on cookie sheet for a few minutes before placing on wire rack.
Cool on a wire rack. (The cookies are tender and crumbly when fresh from the oven. I let them cool on the rack overnight in order to dry out a bit and firm up for ease of spreading the filling.)
Beat together remaining 1/4 cup of butter, cream cheese, and powdered sugar until smooth.
Spread 1 heaping tablespoon filling onto the flat side of 1 cookie, and sandwich with another cookie.
Repeat with remaining cookies. 
Store loosely covered with waxed paper between layers of cookies. (Makes 2 dozen, approx.)

Monday, January 02, 2012

Friends (and A Giveaway!)

***GIVEAWAY NOW CLOSED***CONTEST WINNERS DRAWN***

Back when I was in high school, a friend and I used to have a ritual for escaping from study hall. Open campus allowed us to hop in her car and hit the nearby grocery store for Frosted Strawberry Pop-Tarts and chocolate milk. We would "flip U's" --for those of you not into our small town lingo, that means cruise the main highway, from one end to the other, making U-turns in parking lots to turn around and do it again and again and again--, solve the world's problems, and stuff ourselves with those sweet treats. As mundane as that may sound, I have very fond memories of those aimless hours of driving around.

These days, that friend lives across the state, keeps up with her three daughters, volunteers in her community and church, wrangles her husband, and has her own very successful business. We stay in touch through Facebook, but I can't remember the last time we saw each other, much less shared a sweet treat. If we could both escape for a moment, I would make a platter of Bite-Sized Winter Fruit Tarts and some coffee. This would be my grown-up replacement for Pop-Tarts. Sweet cherries and raisins are balanced with tart, dried cranberries and earthy walnuts to fill tiny little tarts baked in a mini muffin tin. Perfect for sharing with a treasured friend over a cup of coffee...and even portable, if we had the urge to flip U's again.

However, my awesome friend has an even better treat to share with YOU, my friendly blog readers. That very successful business that I mentioned? She is a Pampered Chef consultant. For the past 14 years, this home-based business has provided a steady income for her and her family while offering flexibility for their hectic schedules. She has earned amazing trips and had fun while she worked. It truly has been a dream job for her, and she loves to share the impressive and useful products of Pampered Chef.

She loves to share these great kitchen products so much that she has sponsored this FIRST EVER (wow!) BLOG GIVEAWAY for On My Plate. Rhonda has provided a $50 Pampered Chef Gift Certificate to share with one of my lucky readers. Awesome, right?!? But, wait! There is more!

That great act of friendship inspired me. I have been wanting to do a giveaway here On My Plate f.o.r.e.v.e.r., but haven't been organized enough to get it done. I have decided to add my own $50 Pampered Chef Gift Certificate. This one will be available to "friends" on Facebook.

Yep. You read that correctly. In the next week, you have 2 different options/chances to win $50 from Pampered Chef. What will you buy with your gift certificate? A mini muffin pan to bake Bite-Sized Winter Fruit Tarts? Those great stackable cooling racks from A Few of My Favorite Things? Stoneware or a batter bowl? What would you love to own? Tell me, and it could be yours.

Here are the two ways to win a $50 Pampered Chef Gift Certificate:
  1. Comment here, on THIS blog post, and share with me which Pampered Chef product you dream of owning and what you would use it to make. BONUS: Name gets thrown in the hat an extra time if you plan to try a recipe from On My Plate.
  2. Head over to Facebook and "like" On My Plate (https://www.facebook.com/OnMyPlate) AND comment on the post there for THIS blog post. Again, tell me which Pampered Chef product you can't wait to own and how you want to use it. And again, BONUS  entry for checking out a recipe shared On My Plate.
Each comment will be entered for drawings on January 10, 2012. One drawing will be held for the blog comments, and one drawing will be held for the Facebook comments. Awesome? Awesome.

BTW--because of a little spam/troll issue, I do moderate comments. Don't panic if it doesn't appear immediately, I will check frequently and authorize all entries for the gift certificates. ALSO--If you choose to comment anonymously (and not register with Blogger), please be sure to include your first name or nickname in the comment so that I can identify when you win. Thanks!

Disclaimer or whatever: This blog post is sponsored by my incredible friend, Rhonda. While Rhonda is a Pampered Chef consultant, Pampered Chef is not sponsoring this giveaway. It is a personal venture in the name of friendship from myself and my friend. Opinions stated are purely my own. 

***GIVEAWAY NOW ENDED***CONTEST WINNERS DRAWN***


1 (21 ounce) can cherry pie filling
1/2 cup dried cranberries
1/2 cup raisins
1/2 cup chopped walnuts
1 pastry for double-crust pie (homemade or ready-made refrigerated)
2 tablespoons sugar
 
Combine cherry pie filling, cranberries, raisins and nuts in a medium bowl; set aside.
Roll pie crust on a lightly floured surface.
Cut 48 1 and 1/2 inch circles from pie crust with a biscuit cutter or glass.
Place tiny rounds of crust into mini-muffin pans.
Fill each crust with 1 teaspoon of filling mixture.
Cut 48 small stars (or other shape) from remaining pie crust (re-roll dough as necessary).
Place one small star on each tiny tart.
Sprinkle each tart with sugar.
Bake at 350F for 15 to 18 minutes.
Cool on wire rack.
Store loosely covered. (48 mini tarts)


Check back here On My Plate or on my Facebook page for the announcement of the winners on January 10, 2012. Good luck, and go love your friends! 

***GIVEAWAY NOW ENDED***CONTEST WINNERS DRAWN***

Saturday, December 24, 2011

I hope...

I hope you are enjoying the beauty and wonder of this holiday season.

I hope you have shared love, kindness, and goodness with those around you.

I hope you have found peace and comfort and joy in the celebrations.

I hope you are warm, fed, and safe.

I hope you are happy and thankful.

I hope you have a Merry Christmas, a Happy Hanukkah, a Festive Kwanza, a Blessed New Year, (and relish any and all other reasons you may honor).

I hope you aren't looking for one more treat at the last minute, but if you are, Lemon Drop Fudge is really simple and a bright, citrusy note among the caramel and chocolate treats.

(adapted from Taste of Home)

1/2 cup butter
1 package (4.3 ounces) cook-and-serve lemon pudding
1/2 cup cold milk (I used 1/4 cup 1% milk and 1/4 cup heavy cream.)
4 cups powdered sugar
1-2 teaspoons lemon extract
1 small bag lemon drop candies

Line a 9-inch square pan with foil.
Grease the foil with butter (additional to the amount above), or use Pam.
Crush the lemon drop candies. You want larger shards of the hard candy, not powdery dust.
In a large heavy saucepan, combine the pudding mix, milk, and butter.
Cook and stir over medium heat until thickened. (This takes a little while and requires frequent stirring to avoid lumps. Be sure mixture is thickened and not just melted together.)
Remove from the heat and beat in powdered sugar and extract. 
Pour into prepared pan.
Top with crushed hard candies, pressing candies into the fudge.
Refrigerate until set.
Cut into 1-inch squares to serve. 

Saturday, December 17, 2011

Life is Gran(d)

Twinkly Christmas lights make me happy. Very happy. Giddy, even. It feels like anything is possible and all the troubles melt away when the Christmas lights are sparkling. Life is Grand.

Life is also gran(d) when I have Gran Marnier Truffles to share. Creamy, melt-in-your-mouth chocolate with just a hint of a bright, citrusy, orange flavor. Grand little bites that make my taste buds sparkle.


(adapted from Barefoot Contessa)

1 pound semisweet chocolate (choose a good brand, chocolate chips work, but aren't the best option)
1 cup heavy cream
3 tablespoons Gran Marnier (alternatively, you could use orange extract)
1 tablespoon prepared coffee (not a coffee drinker? pick up a cup to go, or skip it. the coffee does enhance the chocolate flavor, though)
1 teaspoon vanilla extract (I shouldn't have to remind you to use REAL vanilla, right?)
cocoa powder, powdered sugar, and/or finely chopped nuts (pecans are nice)


Finely chop the chocolate.
In a double boiler with simmering water, combine the chopped chocolate and heavy cream.
Stir frequently until the chocolate is fully melted and combined with the cream.
Add the Gran Marnier, coffee, and vanilla.
Stir to combine thoroughly.
Set aside for about 2 hours at room temperature for chocolate to firm up (or pop into the fridge for a shorter period of time).
(At this point, I have been known to get distracted and forget about the truffles. The chocolate can set in the fridge for a day or so and be brought to room temperature (softened, but still holding it's shape...kind like fudge consistency) when you have time to roll the truffles.)
Prepare the coatings by pouring cocoa (I really like Ghirardelli Sweet Ground Chocolate for this.), powdered sugar, and ground nuts (use one or all) into individual shallow bowls.
Spoon small mounds of chocolate from the mix and using your hands roll into balls. (I prefer slightly smaller than walnut, but go big, if you like.)
Roll the chocolate balls into the coating of your choice to cover completely.
Store in refrigerator (will keep for weeks), but serve at room temperature for the full chocolatey-orange flavor. (makes at least 60 truffles)

Thursday, December 08, 2011

Goodies

Today, I am sharing a Christmas goodie over at South Dakota Magazine. If you are a fan of mint, you need to add this Peppermint Fudge to your holiday treat list.


Don't forget to spend some time checking out the links at South Dakota Magazine. They share articles from their archives and tons of interesting events and information about life right here in South Dakota. You can even do a little Christmas shopping. Enjoy!

Wednesday, December 29, 2010

Reaching for More Sugar

On My Plate received a sly little mention in The Post SD's SD in 5 article this week.

SD in 5 is "your 5 minute look at what is happening in South Dakota according to South Dakota bloggers, writers and news outlets." It was a fun surprise to be chosen as one of the featured bloggers.

You can steal 5 minutes away from your day and read the spin on what is happening in SD here: SD in 5

And when those 5 minutes are up, you can reach for more sugar. Butter Pecan Fudge may have been the star of my sweets and treats, but Peppermint Fudge gave it a run for its money. I made a white peppermint fudge last year, but wasn't really happy with it. Maybe my candy canes were old, but it had a kind of old-ladies'-living-room kind of smell and taste. Not cool. This year, I made a few adjustments to a recipe I found at Mele Cotte. The crispness of the peppermint flavor was beyond yummy and just what I was searching for. Perhaps this will be the palette cleanser I need to end my sugary binges. Or, maybe not...


(adapted from Mele Cotte)

18 oz white chocolate chips (I used a mix of white chocolate chips (12 ounces) and a partial bag of white almond bark candy wafers.)
1 (14 ounce) can sweetened condensed milk
2 Tablespoons heavy cream
1 teaspoon pure vanilla extract
1/2 teaspoon baking soda
2 teaspoons pure peppermint extract
1 cup powdered sugar, sifted
1 cup crushed peppermint candies (I only had the candy canes decorating my tree and made a quick dash to the convenience store for Starlite mints.)
sprinkles 

In a heatproof bowl over simmering water, melt chips, condensed milk, cream, and baking soda.  (I actually just use my heavy Le Creuset pan and keep the heat very low.)
Stir frequently; heat until smooth.
Remove from heat. 
Stir in extracts; sift in powdered sugar. (Don't skimp on sifting. Lumps in the powdered sugar are not fun.)
Add crushed candies.
Pour into a parchment or foil lined 8×8 inch pan. (I sprayed my foil with Pam.)
Top with sprinkles.
Refrigerate for 3 hours, or until set. 
Lift lining and fudge from pan to cut into 1 inch cubes. (Yields about 64 pieces)

Why couldn't this peppermint fudge be a fun Valentine's treat by topping with the heart confetti sprinkles? Make your own box of candies for gifts this year?

Sunday, December 26, 2010

Sugar Hangover

How many of you are in a sugar hangover? Were there too many sweets and treats this Christmas season? Christmas Day may have passed, but there is no reason that the sugar overload has to stop.

Last year, I made some Butter Pecan Fudge that was *fabulous*. I had hoped to share it with you here, but it was gone before I could snap a photo. This year, I have managed to save a piece, and even though most of us are groaning that we can't handle another sugar cookie, peppermint stick, or chocolate covered peanut, you really should find an excuse to make a pan of this. I know it is December 26, but who says that the sugar high must end?


1/2 cup butter
1/2 cup heavy cream
1/2 cup sugar
1/2 cup brown sugar, packed
1/8 teaspoon salt
1 cup chopped pecans
1 teaspoon vanilla extract
2 cups powdered sugar

Line an 8-inch baking pan with foil and coat with cooking spray.
In a large saucepan, bring the butter, heavy cream, granulated sugar, brown sugar, and salt to a boil over medium heat, stirring frequently.
Allow to boil for 5 minutes, stirring constantly, then remove the pan from the heat.
Stir in the pecans and vanilla.
Sift in the powdered sugar, and stir until smooth and well combined. (I REALLY do recommend the sifting. It eliminates any lumps in the powdered sugar and makes the stirring that much easier.)
Spread the mixture into prepared baking dish.
Allow to cool to room temperature.
Lift entire "block" of fudge from the baking pan to cut into 1-inch cubes. (This is where the foil comes in handy and makes cutting perfect little cubes easier.)
Store in air-tight container...if there is any left.

Friday, November 19, 2010

Fridge Friday: Episode 12

Ready to peek inside my fridge?
What do you want to make today? I would love to put the kettle on to heat some water for a cup of Vanilla Rooibos Tea with a splash of Vanilla Spiced Rum Creamer (in the door, by the orange juice). This is my newest sipping obsession. However, it doesn't make for much of a recipe to share. How about we do something with those ripe and juicy (and admittedly very out of season) blueberries?

Last summer, I made a Blueberry Streusel Bar recipe from Fine Cooking. It was packed with blueberries and lots of crumbly streusel, but seemed to be a little dry and missing something. I enjoyed the dessert, but didn't find the bars calling me to dig in for seconds. More filling. That is what the recipe needed, and that is what I gave it when I recreated Blueberry Lemon Crumble Bars. They are still packed with blueberries and lots of VERY crumbly streusel (you won't want to try to snack on these in bed), but layered into the middle is a hearty dose of creamy, lemon filling. These Blueberry Lemon Crumble Bars call me back for seconds On My Plate.

(adapted from Fine Cooking)

1 cup unsalted butter, softened
3 cups flour
1 1/2 cups old-fashioned oats
1 1/3 cups brown sugar
1 teaspoon salt
1 teaspoon baking powder
2 eggs, separated
2 cans (14 ounce, each) sweetened condensed milk
1/2 cup fresh lemon juice (Really, squeeze the lemon. The better flavor is worth it.)
2 tablespoons grated lemon zest
3-4 cups fresh blueberries

Heat oven to 350.
Line a 9x13 pan with foil, and butter the bottom and sides of foil
Combine flour, oats, sugar, salt, and baking powder. 
Blend the butter into the flour mixture to form a crumb mixture.
Transfer 1 1/2 cups crumb mixture to another bowl and reserve for topping.
Blend 1 egg white into the remaining crumbs and then press mixture in the bottom of the pan to form a crust.

Bake 10-12 minutes until it forms a dry top.
Meanwhile, in another bowl, whisk the condensed milk, lemon juice, lemon zest, egg yolk, and remaining egg.
Let stand for 5 minutes to thicken slightly.
When the crust is baked, pour filling over in an even layer.
Sprinkle blueberries evenly on top of the filling layer.
Sprinkle reserved crumble topping over the blueberries.
Bake for 30-40 minutes until the topping is brown and filling has set (bars won't jiggle when pan is moved).
Allow to cool completely before cutting into bars. (If you are impatient, the filling will ooze and the crumble will crumble even more than normal.) 
(Yield: 24 bars)

Monday, August 16, 2010

The Pits

Is there anything that you have done in the past, learned the hard way that you shouldn't have done it that way, but STILL do it again? No? None of you are slow learners like me? Really? Be thankful that you have the brains that God gave a goose, because some of us aren't that lucky. It's the pits.

Example: I have a wonderful cherry/olive pitter from Pampered Chef (which after just looking on their website doesn't seem to be available any longer...sorry). The only tiny complaint I have about this amazing, little gadget (and I am not a gadget person, as a rule) is that it doesn't have a spatter shield. As the rod pushes through the cherry stem and pops the pit out the bottom of the fruit, juices spatter everywhere. I am left with what could be the crime scene of a million bludgeoned mosquitoes. Red, blood-like droplets cover every surface within spitting distance.

The first time that I pitted cherries, I was wearing a white shirt and had a stack of freshly washed dishes in the sink beside me. It was awesome to have everything covered in sticky, sweet, bright red spatters of cherry juice. Not. *eyeroll* You would think that I would have learned from that mistake, but unfortunately, I have a very hard head. I am left with the remains of a crime scene pretty much every time I pit cherries, and today was no exception. I wanted to make Cherry Studded Brownies and a Fresh Cherry Sauce to serve with them. And, wouldn't you know it...while I put on an old apron to protect the ancient t-shirt that I usually just wear as pajamas, I didn't think twice about everything on the counter around me. Splat. Splatter. Splosh. Slap! Yes, someone should have slapped me over the mess I made. I am the pits.

But, I think the mess was well worth it when this evening my dinner guests and I dug into ramekins of rich, chocolaty brownie studded with sweet cherries. Scoops of vanilla ice cream melted under the warmth of the candied, fragrant drizzle of fresh cherry sauce. Mmmmm. It is not the pits to have Cherry Studded Brownies with Fresh Cherry Sauce On My Plate.


6 ounces semisweet chocolate, chopped
1/2 cup unsalted butter, cubed
2 tbsp cocoa powder
1 cup granulated sugar
1 tsp vanilla extract
3 eggs
3/4 cup flour
1/4 tsp salt
30 sweet cherries, pitted

Preheat the oven to 350 degrees. 
Spray 6 dessert dishes or ramekins with non stick cooking spray and set them aside on a large baking sheet.
Melt the chocolate and butter, stirring occasionally. (Can use a double boiler, microwave, or as I do, just a really heavy cast iron sauce pan on very low heat.)
In a mixing bowl, combine eggs, sugar, and vanilla until light and fluffy. 
Stir in the cocoa powder. 
Add the melted chocolate mixture.
By hand, stir in the flour and salt until the batter is smooth.
Pour the batter into the prepared dishes, filling 3/4 full. 
Arrange 5 cherries in the top of each baking dish.
Bake for 30-35 minutes until the tops are shiny and a toothpick inserted into the middle doesn't not show wet batter...some moist cake crumbs may cling to the pick.
Cool on rack for 20 minutes. (Serves 6)


1/2 lb fresh cherries, washed & pitted
2 cups water
1/4 to 1/2 cup sugar
1 1/2 teaspoons orange extract

Combine cherries, water, and sugar in saucepan.
Simmer for about 30 minutes or until sauce thickens. Skim occasionally.
Stir in orange extract.
Serve drizzled over ice cream or other desserts.

Friday, July 02, 2010

Fridge Friday: Episode 9

I am cranky today. There is too much on my to-do list, and not enough hours in this day. The wind is a hot and blustery 20 mph pain in my backside with 30-40 mph gusts just to remind me that it can (and will) do whatever it wants. The dogs are barking at imaginary sounds, people are pestering me, and my bottle of Aleve is almost empty. It is one of those days, but here is my Fridge Friday fridge...


Is it just me and my grumpy mind, but does my fridge pretty much always look the same? Most likely, it does. Why wouldn't it? I tend to buy the same types of groceries over and over. On the top right, we have milk, OJ, and a few sodas; the top left holds assorted condiments and at this point, an impressive stack of blocks of cream cheese (I wanted cream cheese for the Candied Jalapenos, but forgot that I had already purchased some. *shrug*). The middle shelf always has the eggs, pickles, extra butter, and some veggies (cauliflower, broccoli, red & green cabbage this time), and today has a bowl of limes and a lemon. Bottom shelf is another mish-mash of fresh veggies (zucchini, green onions, spinach, celery, sweet corn, brussels sprouts), an icy cold beverage, and luscious blueberries and strawberries. There is also a Gladware container with a package of ground beef and some bacon perched on top of the beer. More odds and ends of produce in the bottom right drawer and some cheeses in the bottom left. I am a bit of a creature of habit, and pretty much always put things in the same places. I could probably be a hundred miles away and tell you were to find the jalapenos in my fridge (bottom right drawer, by the way).

Part of the agenda for the day includes Hubs smoking a pork butt at the farm for dinner with some family tonight. The cabbage will be made into coleslaw at some point, and I will fry up the bacon and ground beef to add to my big pot of Cowboy Beans to round out the side dishes for the meal. I don't have those things made yet (and if I don't get my butt moving and get this blog post done, we might just have to have pulled pork and no sides...like that would fly *eyeroll*). So, I am going to zero in on the bowl of limes. Last night, I zested and juiced a few of those tart jewels and whipped up a batch of White Chocolate Lime Cookies.

I am torn by these cookies. They are everything that I love in a cookie: sweet, but not too sweet; tart with real lime; soft and chewy; and EASY. I think that is what makes me feel so guilty. They are so completely, utterly, totally, easy because they start with a cake mix. (OK, serious bakers can click away now. Sorry.) Think what you want about my baking skills, but it has been a trying day and at this point, you might have to just shoot me before I would give up these White Chocolate Lime Cookies On My Plate.


1 box white cake mix
1/2 cup butter, softened at room temperature (melting it makes the cookies texture tough)
2 large eggs
1 tablespoon grated lime zest (don't skip this, it is worth it)
1 1/4 cups which chocolate chips
3 cups powdered sugar
2 teaspoons grated lime zest (again, do it; really)
5-6 tablespoons FRESH lime juice (don't open a bottle, squeeze a lime, please)

Preheat oven to 350°.
Cover cookie sheets with parchment.
With mixer, combine cake mix, softened butter, eggs and 1 tablespoon lime zest until blended and smooth.
Stir in remaining white chocolate chips with a wooden spoon or spatula.
Drop dough by teaspoonfuls, 2 inches apart, onto prepared cookie sheets.
Bake 10-13 minutes or until set at edges and just barely set at center.
Cool 1 minute on sheets; transfer to wire racks and cool completely.
Combine powdered sugar, 2 teaspoons lime zest and enough FRESH lime juice make icing just thin enough to drizzle off fork.
Drizzle icing over cooled cookies. (4 dozen cookies)

Did you think I was going to let this post slip by without another voyeur slide show of other people's fridges? Of course not. I love it when you are willing to share your fridges here on the blog. 


Also, be sure to check out Jeanne at Jeanne Eats World and her fabulous Fridge Friday posts. Scallops on her plate tonight. Doesn't that sound good?

Saturday, May 29, 2010

I Am Not Gilligan

This blog post was originally going to be quite simple. I was going to tell you about baking a Coconut Cake; tell you that Hubs was so enamored of it that he ate 3 pieces in one sitting; tell you that I while I loved the toasted coconut garnish, I wasn't so thrilled with the coconut flavor of the cake itself. I would whine about the gray, rainy, cold day that didn't provide adequate lighting for a good photo. It was going to be a simple post telling you that the cake may be worth it if, unlike me, you were cuckoo for coconut.

Then, my fingers started typing. Suddenly, I was relating my failure of the day and my laziness with shortcuts...so, here's my tale of a fateful cake...

The original recipe called for fresh coconut to be toasted to garnish the entire triple layer cake. While I had no experience cracking a real coconut and shaving out the flesh, I didn't think it could be that hard. After all, Gilligan did it. I managed to puncture the eyes of the coconut with a nail and pour out the coconut water. (Yes, water. A novice like me thought it would be coconut milk. *shrug*) I then followed the suggestion to warm the coconut in a 350 degree oven for half an hour. Whacking it with a hammer was oddly therapeutic, and the coconut cracked easily to reveal...nothing. Huh?!? Images in the magazine showed a thick layer of fresh coconut meat to shave into delicious flakes. The flesh of my coconut was less than a centimeter thick and gooey. Again, huh?!? I don't know what went wrong. Gilligan is obviously smarter than me. I had to resort to bagged, flaked coconut for my cake.

Worn down by the fleshless coconut, I decided that a triple layer cake was too much work for me. My version of the beautiful Cooking Light Fresh Coconut Layer Cake would not include fresh coconut and would not be layered. A 9x13 cake still tastes the same, doesn't it? Well, maybe not. There is that darn ratio of cake to frosting thing that true bakers take into consideration. I am not a true baker, but my Hubs is a true eater. He gobbled this cake like it was the last food left on the island. I guess that even though I am not Gilligan and not a huge coconut fan, my version of a 9x13 Coconut Cake wasn't so bad On My Plate.


Cake:
3 cups sifted cake flour
2 teaspoons baking powder
1/4 teaspoon salt
1 3/4 cups sugar, divided
2/3 cup butter, softened
1 cup warm coconut water (from 1 small brown coconut...if not 1 cup, add tap water)
1 teaspoon vanilla
6 large egg whites
Frosting:
4 large egg whites
1/4 teaspoon cream of tarter
1/8 teaspoon salt
2 tablespoons sugar
1 1/4 cups sugar
1/4 cup water
1 teaspoon vanilla extract
2 cups toasted coconut (shaved fresh if you are as smart as Gilligan, but bagged works OK, if you are like me)

Preheat oven to 350°.Lightly coat 3 9x13 pan with cooking spray and flour.
Combine flour, baking powder, and salt; stir with a whisk. 
Place 1 1/2 cups plus 2 tablespoons sugar and butter in a large bowl; beat with a mixer at medium speed for 2 1/2 minutes or until well blended. 
Add flour mixture and coconut water alternately to sugar mixture, beginning and ending with flour mixture.
Beat in 1 teaspoon vanilla.
In a separate bowl, beat 6 egg whites on high speed until foamy using clean, dry beaters.
Add remaining 2 tablespoons sugar, 1 tablespoon at a time, beating until stiff peaks form (do not overbeat).
Carefully fold egg whites into batter; pour batter into prepared pan.
Bake at 350° for 20-35 minutes or until a wooden pick inserted in center comes out clean. (This is where I am fudging it. I don't remember how long I baked the 9x13 cake & original recipe says 18 minutes for round pans.)
Cool in pan on wire rack.
To prepare frosting, combine 4 egg whites, cream of tartar, and 1/8 teaspoon salt in a large bowl; beat with a mixer at high speed until foamy. 
Add 2 tablespoons sugar, 1 tablespoon at a time, beating until stiff peaks form. 
Combine remaining 1 1/4 cups sugar and 1/4 cup water in a saucepan; bring to a boil. 
Cook, without stirring, until candy thermometer registers 250°. 
With mixer on low speed, pour hot sugar syrup in a thin stream over egg whites. 
Gradually increase speed to high; beat 8 minutes or until thick and cool. 
Stir in 1 teaspoon vanilla. (This is SERIOUSLY AWESOME frosting. Really.)
Spread frosting over top of cake.
Gently press toasted coconut onto top of cake. 
Store cake loosely covered in refrigerator. (Serves 12-16)
Related Posts with Thumbnails