Showing posts with label garlic. Show all posts

Tuesday, June 16, 2015

Keep It Simple

Last week at South Dakota Magazine, I shared my mantra for summer entertaining: "Keep It Simple". Get-togethers with friends are about the friendship, and as I say in that article, nobody is giving bonus points for knocking yourself out. That doesn't mean that simple food can't still be delicious. You can find the super simple recipe for Smoked Salmon Pizza online with South Dakota Magazine. It is a fabulous combination of creamy, crisp, fresh, and salty. Excellent for sharing with friends and pairing with a cold summer beverage.

I believe that simple and delicious can be carried over into all of summer, even (or especially) camping. Recently, some old friends (old as in I have known them since elementary school...not that WE are old) and I made time in our busy summer schedules for a short camping trip. I packed up some staples for quick meals that were so simple, we hardly had to think about them. In fact, the biggest challenge we faced was when I realized I forgot to pack kindling, etc. for our camp/cook fire. (By the way, if you have an old atlas hanging around in your car, it does work well for kindling.)

Once our fire was roaring, I set a couple cast iron pans over the flames. Those pans heated up while I sliced a few vegetables as we continued our conversations. Shrimp was tossed into simmering salsa. Zucchini was sauteed with some other vegetables. A loaf of buttered French bread was heated. Dinner was done and was delicious.

I frequently repeat this menu at home in the summer, sometimes on the grill, and sometimes simply on the stove top. Shrimp, fresh vegetables, and salsa pair together so well. We love to dip the warm, crusty bread in the sauce of the salsa and leftovers can all be stirred together and served inside flour tortillas as burritos, or with corn chips as a hearty dip. Salsa Shrimp and Sauteed Summer Vegetables are the perfect way to Keep It Simple On My Plate.


2-4 tablespoons butter
1 pint salsa (I use my home canned Basic Salsa, but use whatever is your favorite.)
1 pound raw shrimp, peeled and deveined

Melt butter in a heavy skillet (cast iron, if you are cooking over a campfire).
Add the salsa and bring to a simmer.
Add shrimp and simmer 10 minutes or so, stirring occasionally, until the shrimp are opaque and cooked through.


olive oil
diced onion
diced peppers (red, green, jalapeno, whatever strikes your fancy)
1 clove of garlic, minced
kernels of corn cut from cob of one ear of corn
small zucchini, sliced
cherry tomatoes, halved (optional)
salt and pepper (or Montreal Steak Seasoning, or whatever grill seasoning you love)

Heat oil in a heavy skillet (cast iron, if you are cooking over a campfire).
Saute the onions and peppers until tender.
Add the garlic and cook until fragrant.
Add the corn and cook until warmed through.
Add the zucchini and saute until tender.
Season with salt and pepper (or seasoning of your choice).
Add the tomatoes, if using, and cook just until warm. 

Tuesday, March 24, 2015

Losing My Mind

There are days that I think I am undeniably losing my mind.

If I don't add it to a list, I will not make the purchase at the store. If I have to walk into another room or up and down the stairs, I probably won't remember what I wanted to do when I get there. If I start cooking something that needs to simmer, I had better set the timer to check on it later, or it will probably boil dry from neglect. I had to turn the alerts on my washer and dryer back on because even though I seem to constantly be doing laundry, without a reminder, the last load of the day will sit in the machine until it stinks with gross dampness. I probably won't remember your name when I see you; so if I seem stuck up or aloof, I am sorry. In the middle of conversation, a word will leave me completely and totally and I will stammer like an idiot. And, to top it all off, one day not that long ago, I couldn't figure out how to shut off the water in our basement shower. I swear that it took me five minutes of frantically cranking the handles one way or another with the water changing from hot to cold, but never stopping.

The recent push for public awareness of Alzheimer's and other dementia does raise my level of hypochondria. There is a history of some issues on one side of my family, and my husband's family is living with the heartbreaking challenge of a member's diagnosis. I worry that my slips could be some early onset warning signs.

And then, there are times when my forgetfulness is delicious.

While vacationing, one of our lunches was at a bistro with Golden Beet Borscht as the soup of the day. Served with a simple quiche and a fresh tossed salad, that soup was light and delicate, but still flavorful. I knew it was something that I wanted to recreate when I returned home, and after finding a recipe to play with, I began cooking.

I sauteed onions and garlic, added potatoes, beets, cabbage, and zucchini, and simmered all the vegetables in stock. Turmeric boosted the color while dill and lemon brought a brightness. A dollop of sour cream on top was a departure from the bistro's borscht, but was a great contrast for the rich, earthy vegetables. My pot of soup was exquisite, and I proudly thought that I had nailed it.

Then, I looked back at the photos snapped during that trip and see that the bistro's golden beet borscht was creamy. It was still a brothy and light soup, not thick like a chowder, but absolutely creamy. Perhaps instead of that dollop of sour cream on the finished soup, a splash of heavy cream was swirled through the entire pot? It was decidedly not like mine. I had not nailed it.

My soup isn't, after all, a recreation of what we savored on vacation. My memory has, yet again, failed me. However, it failed me in a very delicious way.


(Adapted from Blue Apron)

1-2 tablespoons olive oil
kosher salt
freshly ground black pepper
1 small onion, diced
2 cloves garlic, minced
1 teaspoon turmeric
2 medium golden beets, peeled and cubed
1 pound Yukon Gold potatoes, peeled and cubed
1/4 head of cabbage, thinly sliced
6 cups vegetable stock
1 small zucchini, cubed 
juice of one lemon
1-2 tablespoons fresh dill, chopped (plus more for garnish)
1 1/2 tablespoons honey
4 tablespoons sour cream

Heat olive oil in a large pot.
Add the onion and season with salt and pepper. Cook, stirring often, until softened.
Add the garlic and heat just until fragrant.
Add the turmeric and cook, stirring, until toasted.
Add the beets and, again, season with salt and pepper. (May need to add a little more oil at the point to keep ingredients from burning.)
Cook, covered, but stirring often, until slightly softened.
Remove the lid and add the vegetable stock, potatoes, and cabbage. Bring the soup to a boil, then reduce heat to medium and simmer, stirring occasionally for about 10-15 minutes, until potatoes are tender.
Add the zucchini, lemon juice, dill, and honey and simmer a few minutes more until zucchini is slightly softened.
Remove from heat and serve each bowl topped with a dollop of sour cream and additional dill for garnish. (Serves 4)

Saturday, October 11, 2014

Friendship

This summer, my garden wasn't the best. My tomato plants didn't produce a lot and wanted to wither and die regardless of any pampering. But, it really didn't matter. I had friends who made trips to an area Hutterite Colony and purchased bushels of tomatoes for me, and other friends who gathered their extras and left them on my porch like magic fairies. Thanks to my awesome friends, I had plenty of tomatoes for canning up the pasta sauce that we all love around here.

I have been promising to blog this recipe for years, but one thing after another always seems to get in the way. I am sure most have given up on me. I am not an awesome friend...until now. Here it is. Finally. Thank you for your patience with me.

(BTW...I like to think of myself as anti-gadget, but I did pick up a spiral slicer. Game changer for making zucchini noodles. Truly.)


(If you are unsure of the canning process, there are many informative sites online. I am not a canning authority.)

20-22 pounds of tomatoes 
2 medium onions
2 heads of garlic
3 tablespoons salt
2 tablespoon dried basil
2 tablespoons dried oregano
1/4 cup sugar
1/4 cup balsamic vinegar
1/4 cup lemon juice
1 (6 ounce) can tomato paste
1/2-3/4 cup chopped fresh basil
1/4 cup chopped fresh parsley (optional, but I always have it and use it)

Peel (if you wish, I don't...a few random pieces of skin don't bother me in our sauce) and roughly chop the tomatoes.
Combine the tomatoes with diced onions and minced garlic in a large, heavy pot. (I use my enamel coated cast iron.)
Season with salt, dried basil and oregano, sugar, and balsamic vinegar.
Bring to a boil and then simmer uncovered for at least 30 minutes on medium to low heat, stirring occassionally.
When the tomatoes have cooked down and started to form a sauce, remove from heat and press about half of the tomato mixture through a sieve or food mill to remove most of the seeds and tomato skins and to create a smoother sauce with just a few chunks.
Return to the heavy pot and add the lemon juice, can of tomato paste (if you simmer longer, you may not need this to add a thicker texture), and fresh herbs.
Bring back to a boil and simmer for another 20-30 minutes while prepping the jars and hot water canner for canning.
Ladle into quart jars and seal.
Process in hot water bath for 20 minutes. (Yield: approx 8 quarts)

(If you are unsure of the canning process, there are many informative sites online. I am not a canning authority.)

Wednesday, October 30, 2013

Celebrating Tomatoes into Autumn

Before the first frost a few weeks ago, I dutifully picked all of the yet unripened green tomatoes from the garden. They have been slowly ripening in my pantry and extending the glorious summer bounty. There is nothing better than a fresh garden grown tomato, and I have been selfishly adding thick red and yellow (the yellow tomatoes did REALLY well this year) slices to every sandwich and along side every dinner plate.

With the current damp and frigid weather reminding us that summer is but a memory, a warm serving of these glorious tomatoes was needed. Topping a chunk of salty feta cheese with the celebrated slices of tomato and seasoning with fresh garlic, dried oregano, and a drizzle of olive oil before roasting is the trick.

The garlic becomes so fragrant, the cheese gooey, and the juices of the tomato meld it all together as I dip chunks of toasty bread into this spectacular dish. Individual ramekins make it a great dinner party appetizer or solo dinner, but the ingredients could be spread in any oven-safe baking dish or platter and served family-style. Wrap it up in a foil packet and grill, if you are so inclined. Really, you can't go wrong any way you serve up Roasted Tomatoes and Feta.

(adapted from Food.com)

4 1/2-inch thick slices feta cheese
4-8 slices ripe garden tomatoes, depending on diameter (halved cherry tomatoes work, too)
4 cloves garlic, minced
4 tablespoons olive oil
dried oregano
loaf of crusty bread, sliced and toasted

Preheat oven to 375F.
Arrange 4 ramekins on a baking sheet.
Place one slice of feta in each ramekin.
Top cheese with 1-2 slices of tomato.
Sprinkle with minced garlic.
Drizzle with olive oil.
Season liberally with dried oregano.
Cover entire baking sheet with foil.
Bake for 15-20 minutes until tomatoes soften and release juices and cheese is melted. 
Serve an individual ramekin per person with lots of crusty bread for dipping. (Serves 4)

Tuesday, March 05, 2013

South Dakota Magazine Recap

It is time once again for an update of my recent submissions online at South Dakota Magazine.  I have been contributing articles and recipes to their website every couple of weeks for just over a year and have really enjoyed the process.

Some of these recipes may have already appeared On My Plate, but they are tried and true favorites that have really fit into my menus (and I hope yours).

In November, one second grader was spot on when he told me that I would be hungry later because I didn't finish my lunch. If I would have been feasting on an Open-Faced Hot Chicken Sandwich with Mushroom Gravy, nobody would have had to told me twice to clean my plate.

South Dakota Public Radio noticed another story I shared in November about holiday letters. The accompanying recipe for Green Salad with Pomegranate and Mandarin highlights the juicy bits unlike some seasonal greetings.

December brought a revival of a classic craft that while great as Christmas ornaments could be adjusted to any holiday with the proper cookie cutter shape. Cinnamon Applesauce Ornaments smell so good that they shouldn't be limited to just the Christmas tree.

Garlic and Lemon Salad Dressing is my stand-by for quick salads and has helped me keep off the 10 pounds that I lost during my tonsillectomy. Tip: It is also a great marinade for chicken.

For about two seconds, I considered brewing my own beer from my Christmas tree, but instead used a really flavorful ale to make Beer Brined Pork Chops with Onions.

I gave my endorsement to silly food holidays and celebrations with Brownie Cherry Cheesecake. It really is a party in your mouth.

My most recent South Dakota Magazine submission promotes the great works of Dakota Dachshund Rescue. Our family expanded with the adoption of two more little wiener dogs, and our waist lines are expanding with Deviled Chili Cheese Dogs.

As I look ahead at recipes and ideas for future articles, I wonder what you would like to see? Have a local delicacy that you think deserves to be shared state-wide? Add your suggestions in the comments, and I will see what I can do.


Tuesday, February 19, 2013

The Odd Couple

I like grape jelly and bacon sandwiches. My husband likes saltines along side a bowl of ice cream. Chocolatey hot cocoa is perfect with a hint of the heat of cayenne added to the mug. A friend lists a bacon cheeseburger with peanut butter, grapes tossed in dry jello, and apple pie with cheddar cheese among his favorites. Another food blogger mentions pizza and mashed potatoes as her odd couple of food.

It seems that everyone has their own peculiar food pairings. Pickles and ice cream are not just for pregnant ladies. However, when I noticed a simple soup recipe that contained both cauliflower and potatoes, it seemed odd to me. I had never considered pairing these two white vegetables as the backbone of a soup, but it works.

Onions, garlic, and roasted red peppers flavor the broth along with woody rosemary. Kale ups the earthy factor and makes this a hearty, filling soup. Cauliflower and Potato Soup is finished with the tang of a grating of Parmesan as this odd couple of food warms you from the inside out.


(adapted from Rachael Ray)

3 tablespoons olive oil
2 cups potatoes, peeled and cut into 1/2-inch dice
1 large onion, chopped
5 cloves garlic, minced
3 tablespoons fresh rosemary, finely chopped
kosher salt
freshly ground black pepper
1 head cauliflower, cut into florets
2 jarred roasted red peppers, chopped
6 cups chicken broth
1 small bunch kale, leaves cut from stems and chopped
freshly grated Parmesan cheese

Heat the oil in a soup pot over medium-heat. 
Add potatoes, onion, garlic, and rosemary to the pan.
Season with salt and pepper.
Cook, stirring frequently, until the onions are translucent and potatoes are softened slightly.
Add the cauliflower and toss to coat with seasonings.
Cook for a few minutes.
Stir in the peppers and broth; bring to a boil.
Add the kale a bit at a time, letting each portion wilt before adding the next.
Simmer about 5-10 more minutes.
Serve soup topped with grated Parmesan cheese.
Serves 4.

Monday, December 24, 2012

How to Lose 10 Pounds Before Christmas

Want to drop a few pounds? Have I got a tip for you!

Schedule a tonsillectomy for December 5th.

I lost 10 pounds in just one week.

My jeans fit better. I can tighten my belt another notch. It is awesome. And, there was one point where I would have killed for a cheeseburger.

Before the procedure, several people, including one of my nurses the day of the surgery, shared their painful horror stories of recovery. Thankfully, mine wasn't that bad. The surgery was quick and uneventful. In just over an hour, I was back in my hospital room eating jello and chatting. Another hour or so, and I was on my way home. Unfortunately, a little motion sickness set in during the drive, but soon, I was settled on the sofa with Hubs and the pups watchful for my every need.

I actually even ate very well while my poor throat recovered. We had my husband's famous potato soup, Cheesy Grits with poached eggs, jello, baked potatoes mashed with butter and sour cream, baked sweet potatoes creamed with butter and cinnamon, jello, Pumpkin Pudding, a thrown together creamy sweet potato soup, oyster soup, jello, mashed potatoes, brussels sprouts boiled in salted water until tender, jello, homemade chicken tamales, Spinach and Potato Gratin, jello, homemade pear sauce (like apple sauce), Poached Salmon (minus the tartar sauce), homemade mango ice cream (from a friend), jello, beef and homemade noodles, Egg Drop Soup, runny Malt-O-Meal, and more jello. I learned that throwing a Capri Sun juice drink in the freezer for a bit made a great impromptu slushie that felt good on my sore throat, and I tried to time my meals around the optimal effectiveness of the pain meds. I couldn't eat a lot at any one time, limited to about one-half cup portions for most of the first week, and therefore my energy level was pretty low. But, I had all of my holiday decorating done, and took advantage of the down time to enjoy the sparkling lights and complete my Christmas shopping online from the comfort of the sofa.

As long as I was careful with my food choices and faithful to my medication, I didn't have a lot of pain; it was uncomfortable, but not horrible. But after a few days of soup and jello (and more jello), I was craving the cheesy crunch of nachos, a crispy thin crust pizza, and most of all a cheeseburger stacked tall with bacon, lettuce, and tomato. I tried making a pot roast, and while Hubs thoroughly enjoyed it with mashed potatoes and the accompanying onion gravy, it was a little rough on my throat. Likewise, most bread was difficult to swallow. Therefore, my usual standby sick meal of toast was off limits.

My biggest surprise was how much my teeth and gums ached (supposedly a side effect of the anesthesia?). For the past couple of weeks, I have been brushing my teeth at least 5 times a day because they feel better when clean. My dentist will be happy.

I also learned how many muscles in the throat are involved in a yawn. All I can say is, "Ouch!" Everything doesn't like to be stretched after a tonsillectomy surgery. I took that as a sign that naps were a requirement of recovery.

But, back to that craving for a cheeseburger. It was the first real food that I attempted after a little healing. I ate it all and enjoyed every tentatively swallowed bite, even if it was a little scratchy. The way my mouth watered, you would have thought it was filet mignon and lobster. Now, I am ready for more. Maybe lamb burgers?

I made these Greek inspired lamb burgers several times this summer and really appreciated the contrast of the cool and creamy tzatziki with the garlicky burgers. Crumbles of feta, thinly sliced red onion and tomatoes, and shredded lettuce take this burger over the top of any plain old cheeseburger. Meal-sized burgers are stuffed into the pocket of a pita, but they are perfect bite-sized appetizers when stacked as little sliders with mini pitas. I am so glad that my troublesome tonsils are gone, my throat is on the mend, and I can enjoy Greek Lamb Burgers On My Plate. (But let's hope I don't gain back those 10 pounds.)

(adapted from Once Upon A Chef)

2 slices whole grain bread, crusts removed and cubed
2 tablespoons milk
1/4 cup shallots, finely chopped
2 cloves garlic, minced
1 tablespoon mint, finely chopped
1 teaspoon dried oregano
kosher salt
freshly ground black pepper
1 pound ground lamb
olive oil

Preheat grill.
Moisten bread with milk in a bowl.
Mash to form a paste, and combine with shallots, garlic, min, oregano, salt, and pepper; mix well.
Add the ground lamb and carefully combine. Do not over mix, or burgers will be tough.
Form into 4 to 6 burgers patties
Drizzle patties with olive oil and rub to coat.
Grill patties, about 4 minutes on each side.
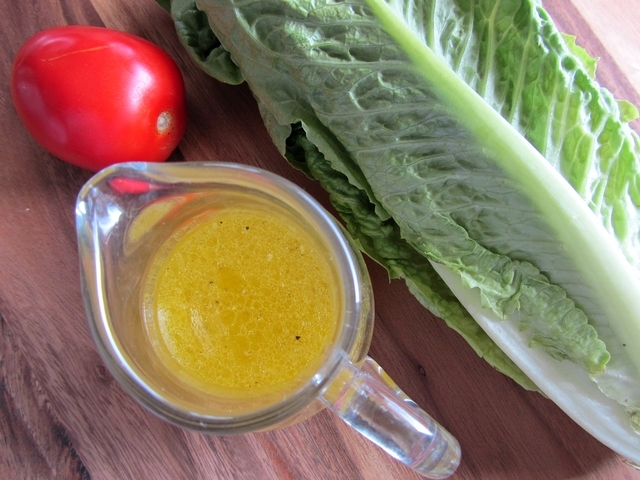
Serve in a pita pocket with crumbled feta, thinly sliced red onion and tomato, shredded lettuce, and tzatziki. (serves 4-6)


2 cups sour cream or plain Greek yogurt
1 seedless cucumber, grated and squeezed dry
2 cloves garlic, grated with Microplane
2 tablespoons olive oil
kosher salt
freshly ground black pepper
2 tablespoons fresh mint, finely chopped

Combine all ingredients. 
Cover and chill for about an hour for flavors to blend.

Monday, October 08, 2012

October 8th


Today is my husband's and my wedding anniversary.

Just as we have spent so much of our lives together, we don't have grand plans.

It will be a quiet night in the comfort of our home.

I will cook something simple, but (hopefully) delicious.

After a long day of working, he will probably fall asleep in his chair.

There is a Zucchini Cake with Cream Cheese Frosting baked with the last monster zucchini from this year's garden.

And tomorrow, we will start building another year of our lives together. 


(adapted from Cooking Light)

5 slices bacon
1 1/2 pounds jumbo sea scallops
kosher salt
freshly ground black pepper
1 cup onion, chopped
6 garlic cloves, minced
12 ounces fresh baby spinach

Cook bacon in a large cast-iron skillet until crisp.
Remove from pan, chop, and set aside.
Reserve 1 tablespoon of bacon drippings in the pan, and increase heat to high. (The pan needs to be screaming hot to properly sear the scallops.)
Pat scallops dry with paper towels (wet scallops don't sear), and season with salt and pepper.
Add scallops to the hot pan and cook 2 1/2 minutes per side, until done.
Transfer to plate and keep warm.
Reduce heat in pan and add onion and garlic.
Saute until onion is tender, but be careful not to burn the garlic (burnt garlic is bitter).
Add the spinach in batches, stirring and cooking until wilted.
Season with salt and pepper to taste.
Divided spinach equally between 4 plates, top with bacon, and serve with scallops. (Serves 4...but, truthfully, only 2 of us ate it all with a crusty baguette and a nice bottle of wine.)

Monday, August 20, 2012

Mother's Little Helper

School has started and moms (and dads) are scrambling to put a meal on the table for kids famished from a full day of learning and sports practices. Dinner needs to be relatively healthy, hearty, and quick. However, nobody has to reach for the Hamburger Helper.

Pasta with Sausage and White Beans is the kind of filling, tummy-pleasing dish that helps moms win at dinner. It comes together easily and blends simple flavors in a delicious way that will make kids reach for seconds. Tossing a quick salad and heating some garlic bread to serve with the pasta makes a complete meal. My mother would have probably skipped the salad and offered corn or green beans on the side and kept it even more simple with plain bread and butter. Do what works for your family; just let Pasta with Sausage and White Beans help get dinner on your kids' plates.

(adapted from Gourmet)

2 tablespoons olive oil
1/2 pound sweet Italian sausage, casings removed
1/2 cup onions, chopped
2 cloves garlic, minced
1/8 teaspoon hot pepper flakes
1 (14-ounce) can diced tomatoes
1 (15-ounce) can white beans, drained and rinsed
2 cups chicken broth
1 pound small pasta, shape of your choosing
1/4 cup flat-leaf parsley, chopped
1/4 cup basil, chopped
1/4 cup Parmesan Cheese, finely grated

Heat oil in a large, heavy skillet.
Cook sausage, stirring to break up into large pieces, until browned.
Add onions, garlic, and red pepper flakes and cook, stirring occasionally until onion is translucent.
Stir in tomatoes, beans, and broth.
Simmer uncovered, stirring occasionally, until slightly thickened and reduced by half, about 15-20 minutes.
Meanwhile, cook pasta according to package directions. Drain.
Toss pasta with sausage mixture, parsley, basil, and cheese until well combined.
Season with salt and pepper, if needed.
Serve with additional grated cheese, if desired. (Serves 4)

Tuesday, April 03, 2012

The Price of Gas

These days, you can't seem to go a single day without hearing someone cry about the price of gas. Arm and leg photos appear on Facebook with regularity. Political agendas are all about pointing fingers and blaming each other (what else is new?). And, all across the nation there are gasps of shock as the numbers on the pump roll higher and higher when we fill our gas tanks.

I have something that might help you out. Bean and Bacon Soup only requires two cans of beans. I know that prices vary from store to store, but at about $1.50 per can, you should be able to fill up without breaking the bank. It might be the only gas you can afford.

(adapted from Real Simple Magazine)

6 strips bacon, chopped (choose a flavorful brand/cut; this is the smokiness of the soup)
1 large carrot, chopped
2 stalks celery, chopped
1 medium onion, chopped
4 cloves garlic, minced
2 15.5-ounce cans white beans, drained (Great Northern or Navy Beans are a good choice for a creamier soup. I used Cannellini beans because that is what I had on hand; they are firmer.)
2 cups chicken stock
1 cup water
1 1/4 teaspoon kosher salt
1/2 teaspoon freshly ground black pepper

In a large Dutch oven, fry the bacon until crisp.
Remove and drain on paper towels.
Over medium heat, add the carrot to the bacon drippings and saute for until tender.
Add the celery, onion, and garlic, stirring and cooking until the tender, being careful not to burn the garlic.
Add the (drained) beans, chicken stock, and water.
Bring to a boil, cover and reduce heat to low.
Allow to simmer for 10 minutes.
Uncover, and with a potato masher, partially mash the beans until the soup thickens slightly.
Stir in the salt, pepper, and bacon. (Serves 6)

Sunday, March 11, 2012

Snobbery, Salad, and Bread Sticks

This past week a restaurant review from Grand Forks, ND became an internet sensation. 85-year-old Marilyn Hagerty submitted an earnest look at a newly opened and very popular hot spot, The Olive Garden.

I have to admit that my first response was to snark. Chain restaurants are not my thing. I honestly try to avoid them. There was a time that I was all about Red Lobster, Olive Garden, and Applebee's. Over time, I have evolved and my tastes have shifted. My snarky, snobby side wanted to claim that I was now better than all that.

Bullsh*t. (sorry, if that seems too bluntly harsh for you) 

Nobody is "better than all that." Some people are snobs, but that doesn't make them better. Ever.

I don't want to be a snob. Ever.

We all come from different backgrounds, have different tastes, experiences, abilities, finances, and even desires. Snobbery about food is, in a word, ridiculous. Of course, we all want healthy options that taste great, but snarking about a restaurant review doesn't do anything positive to accomplish that. There is nothing wrong with an enthusiastic review for The Olive Garden. There is nothing wrong with enjoying a meal out, even at a chain restaurant.

While it won't be my first choice, I will more than likely visit an Olive Garden again some day. I seriously do enjoy their salad and bread sticks. The vinaigrette is perfect with the crisp greens. The bread sticks are soft, warm, and garlicky without making you feel like a you have the breath of the dead after eating them.

Caesar Salad Pizza reminds me a bit of an Olive Garden salad and bread sticks. Brushing the golden, grilled pizza crust with homemade Caesar dressing imparts great flavor. Topping that grilled crust with a light and fresh salad makes a delectable, simple meal.

Use a dough recipe that you love. A soft and chewy crust can be folded over the salad like a taco (or a New York slice). A crispy crust can be held like a cracker with a garden topping. Thicker crusts might need a knife and fork.

Make Caesar Salad Pizza your own based on your own tastes, experiences, abilities, and desires. Enjoy what you love. Forget the critics and the snarks. Don't be a snob. Ever.


1/2 cup grated Parmesan cheese
1/4 cup olive oil
1 clove garlic
juice of 1/2 of lemon
1 canned anchovy fillet
1 pound refrigerated pizza dough (or your favorite recipe)
4 cups romaine lettuce, shredded
1/2 - 3/4 cup cherry tomatoes, halved

Preheat grill to medium-high (we love charcoal, but gas is good, too).
In a food processor or blender, puree the Parmesan, olive oil, garlic, lemon juice, and anchovy.
Divide the pizza dough into 4 portions.
Rub the dough with a little (additional) olive oil, and press to a uniform thickness.
Place dough on the grill, cover, and cook until browned on one side (about 3-4 minutes).
Turn dough and grill until cooked through (about 3 more minutes).
Brush one side of each pizza with the anchovy dressing.
Toss the lettuce and tomato with remaining dressing.
Top the pizza crusts with the salad. (Serves 4.)

Tuesday, February 21, 2012

Pole Position

The Daytona 500 is this Sunday. Hubs is a longtime NASCAR fan, and if he were going to be home, the vroom, vroom of race cars would be filling our living room. However, he is out of town. This frees me to think about another kind of pole position. My pole-enta position. (sorry. bad pun)

I have mentioned before that I am pretty smitten with polenta. The creamy, rich goodness appeals to every happy cell of my body. When I saw a simple Sausage and Mushroom Ragu recipe served over polenta, I raced to try it. It was a scrumptious finish.

If your position prefers pasta to polenta, do please still try the sauce. The Italian sausage flavors the tomatoes as they simmer together into an easily gratifying sauce. It feels homemade without a ton of homemade work. That kind of meal always takes the checkered flag for me.

(adapted from Cooking Light)

1 1/2 tablespoons olive oil, divided
8 ounces Italian sausage (I like the kick of the spicy versions.)
1/2 cup chopped onion
1 pound cremini mushrooms, sliced
3 cloves garlic, minced
1/4 teaspoon kosher salt
1 (14.5-ounce) can diced tomatoes, undrained (I prefer the petite diced version.)
2 1/2 cups chicken stock
1 1/2 cups water
1 cup uncooked polenta
4 ounces cream cheese
1 tablespoon butter

Heat 1 1/2 teaspoons oil in a skillet over medium heat.
Remove sausage from casings and add to pan; saute until browned, stirring to crumble.
Remove sausage from the pan.
Add 1 tablespoon oil to pan and swirl to coat.
Add onion, sauteing until golden.
Add mushrooms, cooking until softened.
Add garlic, saute briefly, until fragrant.
Return sausage to the pan with tomatoes.
Season with 1/8 teaspoon salt.
Reduce heat and simmer gently for 15 minutes. 
Meanwhile, bring broth and water to a boil in a medium saucepan.
Add polenta slowly, whisking well to avoid lumps.
Reduce heat and simmer 20 minutes or until thick, stirring occasionally.
Stir in remaining 1/8 teaspoon salt, cheese, and butter.
Serve with sausage mixture. (4 servings)

Monday, February 20, 2012

The Things You Didn't Do - NYC, volume 4

As you grow older, you'll find the only things you regret are the things you didn't do.~Zachary Scott

Our time in New York City was so very limited. There were countless things that we didn't have time to do. I didn't get to visit the Statue of Liberty, Central Park, Time Warner Center, Magnolia Bakery, the Museum of Modern Art, Chelsea Market, the Brooklyn Bridge, St. Patrick's Cathedral, Chinatown, Tiffany's, the Museum of Natural History, and...oh goodness. I could go on and on with all the things I didn't get to do. However, you know what really makes me a sad panda? I didn't get a slice.

Pizza. I didn't get a slice of pizza. I guess I have to go back.

In the meantime, I will have to make my own. Brussels Sprouts and Salami Pizza is a new-to-us combination that has quickly become a favorite. The salty salami pairs really well with earthy Brussels sprouts and literally dances in a lemon garlic dressing instead of a traditional pizza sauce. Yum. I guess this will tide me over until I go back to NYC for a slice.

(Adapted from Real Simple)

1 clove garlic
2 tablespoons lemon juice (freshly squeezed really is better)
2 tablespoons olive oil
kosher salt
freshly ground black pepper
pizza dough, ready-made or your favorite recipe
1/2 pound Brussels sprouts, thinly sliced (I use a mandolin.)
2 ounces thinly sliced hard salami, sliced into ribbons
2 cups shredded mozzarella cheese
2-4 tablespoons grated Parmesan cheese

Preheat oven to 450F.
Using a Microplane, grate the garlic into a medium bowl.
Add the lemon juice and olive oil and whisk together.
Season with salt and pepper to taste.
With a pastry brush, lightly coat the prepared pizza dough.
Into the remaining dressing, add the thinly sliced Brussels sprouts and ribbons of salami.
Toss lightly to coat with the dressing. (BTW...this is a surprisingly good salad, as well.)
Arrange on the pizza crust.
Top with the cheeses.
Bake 12 to 15 minutes, until golden and bubbly. (Serves 4)

Wednesday, February 15, 2012

The Worst Part of Cooking at Home

Hubs and I went out with friends last Saturday night, and at the Wild West Steakhouse enjoyed the best Seafood Tortellini I have had in some time. They were previewing their Valentine's Day menu over the weekend, and that pasta dish in all its carb-overload glory really hit the mark for me. A little salad, crusty bread, a couple cocktails, a mini cupcake, and some good company made it all bliss.

When the Tuesday of Valentine's Day rolled around, Hubs offered to take me back for another round of said bliss. However, partly out of thriftiness (I am trying to budget for finally finishing that office reno.), partly of laziness (I was willing to shower and dress, but didn't want to do the fuss and muss that I require for going out.), and partly of not wanting to sully the high of that great meal with the chance that trying it again on one of the restaurant's busiest nights might not seem as outstanding, I declined. I chose to cook at home.

I knew just what I was going to make after sifting through some pages torn from magazines long ago. Rachael Ray offered up Shrimp and Spaghetti in Coconut Broth as a new, lighter twist on seafood pasta for us. Pan-frying a few of my Pork Dumplings as an appetizer would be the perfect start for this slightly Asian feast, and of course, chocolates would be the luscious ending. It was very different from that meal we had Saturday night, but still special and delicious.

I had forgotten one thing, though. The worst part of cooking at home is THE.DISHES. Even though I can make a fabulous meal at home, I think I might take Hubs up on his next offer for dinner out. I don't like dishes.


1 13.5-ounce can coconut milk
1 cup chicken broth
1/2 tablespoon Asian fish sauce
1 tablespoon finely chopped garlic
2 teaspoons finely chopped ginger (I don't chop my ginger, instead I grate with microplane.)
1/2 teaspoon chili garlic sauce
1 tablespoon fresh lime juice
1 pound frozen, raw shrimp, thawed (Hubs' preference is tails removed in pasta dishes.)
1 bunch cilantro, coarsely chopped
3/4 pound spaghetti

Bring a large pot of salted water to boil. 
Cook the spaghetti until al dente; drain.
Meanwhile, in a large, deep skillet, bring the coconut milk and chicken broth to a simmer.
Stir in the fish sauce, garlic (that's right, you don't saute the garlic first), ginger, chili sauce, and lime juice; cook for 2 minutes.
Stir in the shrimp and cook until just opaque, about 4 minutes.
Add the cooked spaghetti.
Stir in the cilantro, reserving some as garnish. (Serves 4)

Tuesday, January 24, 2012

On The Side

I just got home from a little trip.
A little trip to NEW YORK CITY!
It was my first time visiting, and I CAN'T.WAIT.TO.GO.BACK.
Everything was so incredible.
My mind is a muddle of all the sights, and sounds, and flavors, and smells.
I don't know if there really are words to describe it all, but I will try.
In a later blog post.
I promise.

Today, I just wanted to remind you that while I was away, I had a new submission go up at South Dakota Magazine. Spinach Parmesan Couscous really is one of my favorite side dishes. In fact, I am thinking about it right now as a base for a braised lamb shank meal that I had in NYC and hope to recreate soon. You should try it...with or without braised lamb shank (but, if you do, share your recipe/technique, please?).


You should also check out all of the beautiful photos and wonderfully written articles at the South Dakota Magazine website. The staff has worked to collect a variety of points of view and highlight many interests here in our state. There is much to be appreciated. I may be anxious to visit New York City again, but South Dakota Magazine epitomizes why South Dakota will always be home, sweet home for me.

Monday, December 19, 2011

Naughty or Nice?

I am not a big believer in "good foods" versus "bad foods." While some things are best not to eat every day and for every meal, nothing in and of itself is really a bad food...except marshmallow fluff. That is bad stuff. No matter what. Trust me. 

Anyway, I believe in attempting balance and moderation. Therefore, since I spent most of Sunday in my annual fudge making experience, it is time to balance that with a few vegetables. The fresher the veggie prep, probably the better after using over 7 pounds of confectioner's sugar in one day. (I didn't eat all the fudge, though...just little samples...a new one, Lemon Drop, is edging its way into my favorites.)

Zucchini sauteed in garlicky oil until golden, cherry tomatoes warmed until bursting with their juices, and vivid, fresh basil combine to make a lovely, balanced side dish with some simply prepared fish and a loaf of crusty bread. It is a lighter meal that balances well with the sugary, sweets of the season.

Nothing is naughty. It is all nice with Sauteed Zucchini, Tomatoes, and Basil On My Plate.

(adapted from Farm+House+Table)

4 zucchini, sliced lengthwise into spears
1 cup cherry tomatoes, sliced in half
3 cloves garlic, sliced
olive oil
kosher salt
fresh ground black pepper
1 small bunch basil, torn into large pieces

Heat olive oil in braising pan.  
Add the garlic and saute briefly.
Add the zucchini, in batches, and cook until golden, turning to sear each side.
You may need to pull the garlic out while sauteing the zucchini, if it starts to darken too much. Burnt garlic isn't a good thing.
Add the sliced cherry tomatoes.  
When tomatoes begin to soften and release juices, return zucchini to the pan.
Season with salt and pepper. 
Add basil and toss to combine. (Serves 4)

Friday, December 09, 2011

Steak/Stake Out

I made the most delicious steaks last night. The marinade recipe was discovered last summer, but I had forgotten how really simple and perfect it was with Flat Iron steaks. Incredibly divine. Really. Unfortunately, I was too lazy to fire up the grill in our cooler (and snow falling) temperatures, but the Rosemary and Garlic Flat Iron Steak was still juicy and succulent when seared to perfection on the cast iron grill pan indoors. We paired it up with some roasted acorn squash and steamed asparagus and finished the meal with a few Gran Marnier Truffles. The twinkle of Christmas lights made dinner seem almost magical. *sigh*

And speaking of the magic of Christmas lights (great segue, huh?), we have another stake out under the kitchen Christmas tree. Sissy set up command under the tree and slept on its skirt all last holiday season. This year, Ace is in control of stalking Santa. The pups are determined to catch the jolly old elf in the act. Maybe we will grill up a few Rosemary and Garlic Flat Iron Steaks and talk about that naught or nice thing over dinner...

(adapted from Food.com)
2 flat iron steaks (1 pound-ish, total)
2 tablespoons olive oil
2 garlic cloves, minced
1 teaspoon rosemary, chopped
1/4 cup cabernet sauvignon wine
salt
fresh ground pepper
1/2 teaspoon dry mustard

Combine all marinade ingredients in a shallow dish or Ziploc bag.
Add the steaks and marinate for 1 hour, turning frequently to ensure even distribution of flavors.
Grill over hot coals or in heated grill pan for (roughly) 4 minutes per side.
(Flat Iron steak is best cooked rare to medium rare for optimum flavor.) Serves 2.

Friday, December 02, 2011

Humming

Let me go on record as stating that the Crazy Target Lady in the commercials is highly annoying. HIGHLY ANNOYING. However, the chorus from her recordable Christmas greeting card commercial has wormed its way into my head. I find myself humming it as I decorate the tree, as I wind garland on the stairs, as I hang the stockings. Occasionally, the notes of "Away in a Manger" or "Little Drummer Boy" surround me, but that darn Target commercial has got me this year.

Another thing that has got me is hummus. I am snacking on it more and more. Although I once was not a fan of the chickpea, garbanzo bean, or whatever you may call it, I have warmed to it pureed into a beautiful, protein-rich dip. Maybe more that just warmed to it. You might call me the Crazy Hummus Lady. I have been enjoying it a lot as an alternative to creamy dips with my veggies and loving it with warm flat bread. I spoon it onto mushrooms, top with a tomato and broil for the yummiest (and simplest) stuffed fungi ever. I even make hummus pizzas with flour tortillas spread with the creamy stuff and topped with black olives and a little feta.

Hummus is here. Fa La La La.


1 head garlic
1 15-20 oz can chickpeas (garbanzo beans) with liquid
juice of 2 lemons
2 tablespoons creamy peanut butter (Traditionally, you would use tahini, but I often don't have that on hand. By all means, use it if you have it.)
3/4 teaspoon cayenne pepper
1 1/2 teaspoon ground cumin
1 teaspoon freshly ground black pepper
1 1/2 teaspoon kosher salt
1 tablespoon olive oil 

Preheat oven to 375F. 
Cut the crown from the top of a head of garlic, place in a small baking dish and drizzle with olive oil.
Cover baking dish with foil and roast for 45 minutes. (Do 2 heads. Trust me. It will be so sweet and wonderful, you will eat one before it can become part of the hummus.)
Meanwhile, drain chickpea liquid into a small saucepan.
Skin the chickpeas by pinching off and discarding the shells. (Again, trust me. This is time consuming, but produces a much smoother hummus.)

Add skinned chickpeas to the saucepan and simmer on low heat.
When garlic is done roasting, squeeze the cloves into the bowl of a food processor and discard skin.
Add chickpeas and liquid and process until smooth.
Add remaining ingredients and process until combined. 

Season to taste.
Best served at room temperature.
Garnish with cayenne pepper and drizzle with extra virgin olive oil.

And, just because I can be as highly annoying as the Crazy Target Lady: 

Monday, April 25, 2011

What a Hassle

Know what my current hassle is? Keeping the floors clean. We have two dogs. Cute. Adorable. Mindlessly barking. Mini Dachshunds. (why in the world can I never spell that word correctly on the first try?) Ace and Sissy love us unconditionally. But, they also track in so much crud that my floors are NEVER EVER clean. I sweep. I mop. I Swiffer. I dust. (Thankfully, no vacuuming, as we have all hardwoods...well, except the stairs...but, I do those with a handvac.) And, always there is dirt and mud and yuck on the floors. Little puppy paw footprints trail through the house. (At least I know where they have been, I guess.) Trying to keep the floors clean can be such a hassle.

Know what isn't a hassle? Hasselback Potatoes. These pretty, roasted potatoes may look like a lot of trouble, but honestly, the prep is quite simple. I plopped my scrubbed russets down on the cutting board between two chopsticks to use as a guide to not cut clear through the potato as I sliced. Tucking thin slices of garlic and slivers of butter between the layers insures a delightfully flavored, creamy flesh while the skins crisp up beautifully. These potatoes are the best of both the crispy almost-potato-chip world and hearty baked potatoes. It is absolutely not a hassle to have Hasselback Potatoes On My Plate.

(adapted from Seasaltwithfood)

4 potatoes (I used medium-sized Russets.)
3-4 cloves garlic, thinly sliced
4 tablespoons butter, sliced super thinly
2 tablespoons olive oil
kosher salt
freshly ground black pepper


Preheat the oven to 425.
Put the potato on a cutting board, flat side down, between two chopsticks.
Starting from one end of the potato, cut almost all the way through (using the chopsticks as a guide to stop cutting) at about 3 to 4 mm intervals.
Arrange the potatoes on a baking sheet.
Insert the garlic in between every other layer.
Insert butter between the opposite layers.
Drizzle with olive oil.
Sprinkle with salt and freshly ground black pepper.
Bake the potatoes for about 40 minutes or until the potatoes turn crispy and the flesh is soft. (Serves 4)

Saturday, February 05, 2011

I Won't Be Able to Button My Jeans by Spring

After a couple of sunny and relatively warm days, it is once again snowy/icy/freezing rain-y and cold. I guess it is still winter. I guess I still have excuses to make luxurious comfort food. I guess I won't be able to button my jeans by spring. *Oink.*

Oh yes. Oink. The creamy, cheesy pasta dish On My Plate today is oinking with bacon. Cauliflower also swirls around in the garlic sauce, but trust me, telling yourself that the cauliflower cancels out the bacon only works until you try to button your jeans. 

However, PLEASE (pretty please with bacon on top) don't let that stop you from comforting yourself on a cold evening with some Cauliflower Rigatoni. You can forget about the falling snow and icy streets and frigid temperatures when this Alfredo-like pasta dish warms you. It is rich and hearty and the kind of comfort food that you can even share with guests. This is why they make sweat pants, right?


(adapted from Food and Wine)

3 ounces bacon, cut into 1" pieces (or more if you are an oinker like me)
3 1/2 tablespoon olive oil
1 large garlic clove, thinly sliced
1 cup heavy cream
Kosher salt
freshly ground pepper
3/4 pound rigatoni
One 1 3/4-pound head of cauliflower, cut into 1-inch florets
1 cup panko (Japanese bread crumbs)
1/2 cup freshly grated Parmesan cheese


Preheat broiler.
Bring a large pot of salted water to boil.
In a medium skillet, fry the bacon until crispy.
Remove to a paper towel lined plate and set aside.
To the bacon drippings add 1 tablespoon of the olive oil.
Add the garlic and cook over moderate heat until lightly golden.
Add the cream and simmer until thickened slightly.
Season with salt and pepper.
Meanwhile, add the rigatoni to the boiling water and cook the until al dente; about 6 minutes before the rigatoni is done, add the cauliflower florets to the pot. (This is a bit of a multi-tasking dish, but nothing is too difficult.)
Drain, reserving 2 tablespoons of the pasta cooking water.
Meanwhile, in a medium bowl, toss the panko bread crumbs with the Parmesan cheese and the remaining 2 1/2 tablespoons of olive oil; season with salt and pepper.
Return the rigatoni and cauliflower to the pot.
Add the garlic cream, the bacon and the reserved pasta water and toss until the pasta is coated.
Pour the pasta into a large shallow baking dish and sprinkle the panko mixture evenly over the top.
Broil for about 2 minutes, rotating constantly, until the topping is evenly browned. (Serves 4)
Related Posts with Thumbnails