Showing posts with label nuts. Show all posts

Saturday, March 14, 2015

3.14159265359

We are going to party like it's 3.14.15.
Happy Pi Day!


(adapted from Bon Appetit)

1 disk pie crust dough (for single-crust pie, unbaked)
6 tablespoons unsalted butter
1 cup corn syrup
1 cup sugar
4 eggs
2 tablespoons Spiced Rum
2 teaspoons vanilla extract
pinch of salt
2 cups pecans

Rum Whipped Cream
1 1/2 cups heavy cream
3 tablespoons brown sugar
1 tablespoon Spiced Rum

Preheat oven to 350F.
Roll out pie crust dough into a 12 to 13 inch round.
Transfer to a 9-inch pie plate.
Trim, fold over, and crimp the edge; set aside.
Melt butter in a heavy skillet (my cast iron works well for this) and cook until golden brown and fragrant.
Whisk in the corn syrup and the sugar.
Cook stirring until sugar is dissolved and mixture is smooth.
Remove from heat and transfer a bowl to cool to room temperature (about 15-20 minutes).
Beat eggs, rum, vanilla, and salt in a large bowl to combine.
Gradually add the sugar mixture and stir to combine.
Fold in the nuts.
Pour into prepared pie crust.
Bake for 45 minutes, or until golden. Cool completely before serving.

Rum Whipped Cream
Beat whipping cream, brown sugar, and remaining rum until peaks form. Chill until serving with pies.

Monday, April 28, 2014

Oleo

I grew up with my mother sometimes referring to the sticks of Parkay and Blue Bonnet in our fridge as "oleo." An older lady we knew called it "oleomargarine," which a little online sleuthing tells me is the original name for a butter substitute developed in France using mostly beef fat and vegetable oils. Over time, it seems that the commercial recipe for margarine, as it came to be known, was altered several times due to availability of ingredients, but ultimately came to be made up of mostly oils.

As a kid, those sticks of oleo were whipped into cookies and baked into cakes. Tubs of the spread were slathered on toast and just plain old "bread and butter." It was what I knew and what, at the time, I liked. We didn't eat real butter in my childhood home; which now that I think about it seems a little odd since my mother also made weekly pilgrimages to an area dairy for fresh, whole milk for the her large family. But, that is probably a topic for another blog post.

Today, I came here to talk about oleo...and what it has come to mean to me. As an adult, my home has evolved into pretty much a butter only refuge. There are stray sticks of margarine that make their way into the house for a very select few recipes that benefit from the higher water content, but overall, 99.9% of our consumption is butter. I have come to prefer the flavor of real butter. Blame it on the marketing of the dairy council, but when I now hear the word "oleo," my mouth fills with the feel of grease. I don't want margarine. At all.

So, it was a little shocking (and honestly, as snobby as it may seem, a little revolting) when I saw a television commercial for a major drugstore brand of shampoo announcing its newest therapy for hair, Oleo Therapy. Umm...what?!? I know that beer, mayonnaise, eggs, avocados, olive oil, and recently, coconut oil have all been brought out of the kitchen as beneficial products for our follicles, but OLEO? I doubt that the product does actually contain margarine; who wants to smear I Can't Believe It's Not Butter on their head? But, seriously, is there nobody on the L'Oreal marketing team that remembers oleo as margarine? I don't get it. Oleo Therapy doesn't seem like a spa-quality product to me. It seems like a mouth full of grease. I won't be rushing out to treat my hair to Oleo Therapy.

I could possibly be rushing to treat myself to Graham Cracker Bars made with real butter. This is a slightly different take on the classic Saltine Toffee Bars. Graham Crackers are layered with toffee bits and almonds before being drenched with a syrup of melted REAL BUTTER and sugar. The bars are baked to a bubbly goodness and then topped with chocolate chips and flaked salt. Simple and delicious. Not a mouth full of grease. 
Graham Cracker Bars at On My Plate
Graham Cracker Bars
(adapted from Everyday Food)

13 graham crackers
1 bag (8 ounces) toffee bits
1 1/2 cups coarsely chopped toasted almonds
1/2 cup sugar
1 cup unsalted butter
3/4 cup semisweet chocolate chips
3/4 teaspoon coarse salt

Preheat oven to 350F. 
Line a baking sheet with foil. Arrange graham crackers in a single layer on sheet, edges touching. 
Sprinkle toffee bits and almonds over graham crackers.
Bring sugar and butter to a boil over medium-high. 
Reduce heat and cook at a rapid simmer, stirring occasionally, until mixture is syrupy, 2 minutes.
Immediately pour over graham crackers. 
Bake until sugar topping is bubbling, 12 minutes. 
Remove from oven and immediately sprinkle chocolate and salt over graham crackers. 
With a sharp knife or pizza cutter, cut into 2-inch squares.
Let cool completely. (Serves 24)

Wednesday, July 11, 2012

Healthy?

We have all seen the commercials with the harried mom serving a breakfast of milk and toast to her fussy kids before they run out the door. She extols the virtues of spreading that toast with generous portions of sweet and chocolatey Nutella hazelnut spread. If you are like me, your mind did a quick spin, you raised an eyebrow, and said, "Really?!?" You knew that a daily breakfast of Nutella shouldn't be categorized as healthy, but there it was televised for the world to see.

It seems that some of the world believed it. A class action suit was filed against Nutella for its health claims, and reportedly, a $3.05 million settlement was reached. Wow. That is a lot of unhealthiness.

I am not someone who believes that any foods should be off limits. (Well, except Fluff...yuck.) I seriously do believe that a healthy diet is about moderation and balance. Nutella is a delicious treat that can be balanced with fresh fruits and vegetables, whole grains, lean proteins, and dairy. Balance. Moderation. And, not believing everything you see in a TV commercial. That is what is healthy.

So...if I grill some fresh pineapple to char some of the sugars and release warm, flavorful sweetness, then top it with a drizzle of melted Nutella and a sprinkle of toasted hazelnuts, is that healthy? Compared to a huge slab of chocolate cake, maybe. It is fruit. Nuts are loaded with essential fats. Nutella is used moderately.

I won't make any healthy claims. Class action suits aren't really my thing. I will just tell you that Grilled Pineapple with Nutella is delicious way that I try to find balance and moderation.


1 pineapple, peeled, cored, and cut into 1/2-inch thick slices
3-4 tablespoons Nutella
1-2 tablespoons whipping cream
2 tablespoons chopped hazelnuts, toasted 


Heat grill. (Gas, charcoal, or just an indoor grill pan...your choice.)
While grill is heating, toast the hazelnuts in a hot, dry pan. Watch carefully and remove from pan immediately (they will continue to toast to a crisp if left in contact with the heated surface)
Grill the pineapples slices over medium-high heat for about 3 minutes per side, just to heat through and create grill marks. (Some recommend brushing the grill with oil, butter, or Pam before grilling the fruit. I don't, and have had good success.)
Meanwhile, combine Nutella with whipping cream and heat in a saucepan or in microwave until smooth. (Don't overheat, as the oils in the nut spread will separate.)
Arrange the pineapple on a platter.
Drizzle with Nutella mixture.
Sprinkle with chopped hazelnuts.
Serve with vanilla ice cream or whipped cream, if desired, but I think it is good just as is. (Serves 4)

Tuesday, June 05, 2012

The Most Important Meal of the Day

I have told you how I have trouble with lunch. I get wrapped up in projects and forget to eat...or the fridge is full of "ingredients" and not "food" and cooking for just myself seems like a hassle. Unfortunately, I also have trouble with breakfast.

Breakfast foods are my heart's desire. Pancakes and waffles. Eggs: poached, scrambled, fried, or rolled into an omelet. Bacon. Sausage. Biscuits. Sweet rolls. Fruit. Bagels. Lox. Burritos and cold pizza. Big glasses of milk and steaming mugs of coffee or tea. Those foods make me drool. Except when I wake up. Food sounds gross first thing in the morning.

I need to get up, move around, wake up a bit before I want to partake of a delicious morning meal...BUT, I always stay in bed as.late.as.possible. (I have my fabulous friend, insomnia, to thank for that.) So, if I am on a schedule, you can pretty much count out time for breakfast after I have finally drug my butt through the shower and gotten myself presentable for the world. If I am not leaving the house, when I finally think I am ready to eat, I am probably wrapped up in a project or the fridge is full of "ingredients" instead of "food." Sound familiar? Yes. It is the same song and dance that is my excuse for not eating lunch. Second verse, same as the first.

I require something simple to eat that is also easily portable, if need be. Brown Sugar Granola is the tasty solution. I can have it as cereal with milk, fresh or dried fruit optional. I can fill a baggie with these crunchy morsels and some dried fruit to gobble by the handful on the go. Or, I can gorge on savor it my favorite way, as a topping with Greek Honey Yogurt and fresh fruit. (BTW...Hubs favorite way to inhale enjoy it is sprinkled over a bowl of vanilla ice cream.) Brown Sugar Granola is one way I manage to (sometimes) get breakfast On My Plate.

(adapted from The Food Network)

1 1/2 cups brown sugar
1/2 cup water
4 teaspoons vanilla extract
1 teaspoon kosher salt
8 cups old fashioned rolled oats (not instant or steel cut)
1 cup pecans, coarsely chopped
1 cup almonds, coarsely chopped

Heat oven to 275F.
Line baking sheets with parchment.
Combine brown sugar and water in a microwavable bowl or measuring cup.
Microwave on 'High' for 5 minutes, until sugar is dissolved.
Remove from microwave, stir in salt and vanilla.
 Meanwhile, in a large bowl, combine oats and nuts.
Add the brown sugar mixture and stir to coat evenly.
Spread on cookie sheets and bake for about 1 hour, until oats and nuts are roasted.
When granola has cooled completely, store in an air-tight container.
Note: I have found that it keeps better if I don't mix dried fruit in for storage and just add to individual portions. 
(Serves 10-12)

Sunday, February 12, 2012

I Heart NY - NYC, volume 3

On our last day in New York City, we spent the morning at the 9/11 Memorial. This tribute is extremely powerful and moving. There really are no words for the weight of the sadness that hits as one reads the names etched in bronze around the reflecting pools of each life lost. We all watched in horror a those planes struck and the towers fell. Walking on those grounds and gazing into the ponds and waterfalls, one feels a great responsibility to honor those fallen, to be a better person, and to never forget.

The rest of the day was spent wandering and eating. Eating and wandering. We walked blocks and blocks and stopped anywhere that looked appealing. A drink here. An appetizer there. A dessert in another place. A spinach pie from a deli. A warming cup of cappuccino. We nibbled through restaurants, and diners, and delis, and bakeries. We sampled anything that caught our fancy, and even though our bites were small, by the time our feet were tired and we were ready to head back to the hotel, my tummy was so full I thought I might burst. It was incredible. The best. I want to go back and do it again. Right now. Right.Now. I heart New York.

One of the places we stopped was Amy's Bread. After our slightly disappointing dinners, I was looking for one thing to really love. One outstanding food needed to stand out for this trip, and I found it at this bakery. Salted Butterscotch Cashew Bars rocked. Totally. Completely. We bought one and split it as we walked the few blocks to another stop. Immediately, I wanted more...even though I was rapidly reaching my full button. We dissected the flavors and debated the ingredients. When we got back to the hotel, I did an online search for the recipe. I was in love.

These sweet, salty, chewy, nutty bars of perfection would be an excellent treat for your Valentine (since that day is rapidly approaching). Or, if Cupid hasn't hit you, just make a pan for yourself. Don't eat them all in one sitting, though. Salted Butterscotch Cashew Bars are rich. Deliciously rich. Deliciously divine. I heart Salted Butterscotch Cashew Bars.


(from Amy Sherber, The Sweeter Side of Amy's Bread 

Crust:
2 2/3 cups flour
2 teaspoons kosher salt
1 1/4 cups unsalted butter, cold
1 1/8 cups light brown sugar, packed

Topping:
1 2/3 cups butterscotch chips (this is the rough measurement of a package of butterscotch chips)
1/2 cup plus 2 tablespoons light corn syrup
3 1/2 tablespoons unsalted butter
2 tablespoons water
1/4 teaspoon kosher salt
2 cups cashew pieces, roasted and salted

Preheat the oven to 350F.
Line a 12 x 17-inch sheet pan with aluminum foil.
Grease lightly with softened butter.
To make the crust, cut the butter into the flour, alternating with the brown sugar, using a pastry blender to form a coarse meal. (Alternatively, use a food processor fitted with a metal blade.)
The dough will be a little crumbly but will almost form a ball.
Spread the crust evenly in the bottom of greased pan, patting in gently.
Be careful not to pack it down too much or the crust will become tough.
Bake it for 5 minutes then prick the dough lightly with a fork all over, and return the pan to the oven and bake for about 10 more minutes.
The crust should be slightly browned and soft to the touch.
Remove from the oven and allow the crust to cool for several minutes.(Cooling is important, as the hot topping will destroy a warm crust.) Do not turn off the oven.
To make the topping, melt the butterscotch chips, corn syrup, butter, water, and salt and cook over medium heat, stirring constantly until the chips have melted completely and the topping has just begun to simmer, about 5 minutes.
Stir the cashew pieces into the hot topping and spread it evenly over the baked crust.
Bake again for 11 to 15 minutes, or until the surface is brown and very bubbly.
Allow the bars to cool completely on a wire rack before cutting. (Yield: 25 bars)

Monday, January 16, 2012

Citrus Belt

The weather has been so mild this January. The majority of our days have been in the 40s and 50s, with several creeping up into the 60s. 60 degrees. In January. In South Dakota. In-credible.

I wore my flip flops to enjoy it and considered planting citrus trees in the backyard. A lemon, a lime, an orange, and a grapefruit tree to keep me company in the sunshine. Maybe clementines, too. I do love those cuties.

But, it seems that after every 60 degree heat wave, the weather takes a schizophrenic jump and throws us back to the reality of South Dakota winters. We still haven't had much snow, but we have had wind chills. Bitter cold, freeze any exposed body parts wind chills. Brrr.

Instead of planting citrus trees, I think I will stay inside and bake some Grapefruit and Pecan Quick Bread. Something warm in the oven suits the chill outside.


Grapefruit and Pecan Quick Bread
(adapted from Cooking Light)

1-2 large pink grapefruits
1 tablespoon grated grapefruit zest
2 cups all-purpose flour
3/4 cup sugar
3/4 teaspoon baking soda
1/2 teaspoon baking powder
1/4 teaspoon salt
2 tablespoons vegetable oil
1 teaspoon vanilla extract
1 egg
1/2 cup chopped pecans
Vegetable cooking spray
1/2 cup sifted powdered sugar
1 tablespoon water

Preheat oven to 350F.
Over a bowl, peel and section grapefruit, reserving juice and membranes. Set sections aside.
Squeeze membranes to extract juice; discard membranes.
Place sections and juice in a food processor, and pulse 3 times.
Set aside 1 1/4 cups mixture; reserve remaining grapefruit mixture for another use. (It works well in a citrusy vinaigrette salad dressing.)
Combine zest, flour, and next 4 ingredients in a large bowl; make a well in center of mixture.
Combine grapefruit mixture, oil, vanilla, and egg; stir well. Add to dry ingredients, stirring just until moistened.
Stir in pecans.
Pour batter into an 8 1/2 x 4 1/2-inch loaf pan coated with cooking spray.
Bake for 1 hour or until a wooden pick inserted in center comes out clean.
Remove from oven; place on a wire rack.
Combine powdered sugar and water; stir well with a wire whisk.
Drizzle over bread; let cool in pan 10 minutes.
Remove from pan; let cool completely on wire rack.

Monday, January 02, 2012

Friends (and A Giveaway!)

***GIVEAWAY NOW CLOSED***CONTEST WINNERS DRAWN***

Back when I was in high school, a friend and I used to have a ritual for escaping from study hall. Open campus allowed us to hop in her car and hit the nearby grocery store for Frosted Strawberry Pop-Tarts and chocolate milk. We would "flip U's" --for those of you not into our small town lingo, that means cruise the main highway, from one end to the other, making U-turns in parking lots to turn around and do it again and again and again--, solve the world's problems, and stuff ourselves with those sweet treats. As mundane as that may sound, I have very fond memories of those aimless hours of driving around.

These days, that friend lives across the state, keeps up with her three daughters, volunteers in her community and church, wrangles her husband, and has her own very successful business. We stay in touch through Facebook, but I can't remember the last time we saw each other, much less shared a sweet treat. If we could both escape for a moment, I would make a platter of Bite-Sized Winter Fruit Tarts and some coffee. This would be my grown-up replacement for Pop-Tarts. Sweet cherries and raisins are balanced with tart, dried cranberries and earthy walnuts to fill tiny little tarts baked in a mini muffin tin. Perfect for sharing with a treasured friend over a cup of coffee...and even portable, if we had the urge to flip U's again.

However, my awesome friend has an even better treat to share with YOU, my friendly blog readers. That very successful business that I mentioned? She is a Pampered Chef consultant. For the past 14 years, this home-based business has provided a steady income for her and her family while offering flexibility for their hectic schedules. She has earned amazing trips and had fun while she worked. It truly has been a dream job for her, and she loves to share the impressive and useful products of Pampered Chef.

She loves to share these great kitchen products so much that she has sponsored this FIRST EVER (wow!) BLOG GIVEAWAY for On My Plate. Rhonda has provided a $50 Pampered Chef Gift Certificate to share with one of my lucky readers. Awesome, right?!? But, wait! There is more!

That great act of friendship inspired me. I have been wanting to do a giveaway here On My Plate f.o.r.e.v.e.r., but haven't been organized enough to get it done. I have decided to add my own $50 Pampered Chef Gift Certificate. This one will be available to "friends" on Facebook.

Yep. You read that correctly. In the next week, you have 2 different options/chances to win $50 from Pampered Chef. What will you buy with your gift certificate? A mini muffin pan to bake Bite-Sized Winter Fruit Tarts? Those great stackable cooling racks from A Few of My Favorite Things? Stoneware or a batter bowl? What would you love to own? Tell me, and it could be yours.

Here are the two ways to win a $50 Pampered Chef Gift Certificate:
  1. Comment here, on THIS blog post, and share with me which Pampered Chef product you dream of owning and what you would use it to make. BONUS: Name gets thrown in the hat an extra time if you plan to try a recipe from On My Plate.
  2. Head over to Facebook and "like" On My Plate (https://www.facebook.com/OnMyPlate) AND comment on the post there for THIS blog post. Again, tell me which Pampered Chef product you can't wait to own and how you want to use it. And again, BONUS  entry for checking out a recipe shared On My Plate.
Each comment will be entered for drawings on January 10, 2012. One drawing will be held for the blog comments, and one drawing will be held for the Facebook comments. Awesome? Awesome.

BTW--because of a little spam/troll issue, I do moderate comments. Don't panic if it doesn't appear immediately, I will check frequently and authorize all entries for the gift certificates. ALSO--If you choose to comment anonymously (and not register with Blogger), please be sure to include your first name or nickname in the comment so that I can identify when you win. Thanks!

Disclaimer or whatever: This blog post is sponsored by my incredible friend, Rhonda. While Rhonda is a Pampered Chef consultant, Pampered Chef is not sponsoring this giveaway. It is a personal venture in the name of friendship from myself and my friend. Opinions stated are purely my own. 

***GIVEAWAY NOW ENDED***CONTEST WINNERS DRAWN***


1 (21 ounce) can cherry pie filling
1/2 cup dried cranberries
1/2 cup raisins
1/2 cup chopped walnuts
1 pastry for double-crust pie (homemade or ready-made refrigerated)
2 tablespoons sugar
 
Combine cherry pie filling, cranberries, raisins and nuts in a medium bowl; set aside.
Roll pie crust on a lightly floured surface.
Cut 48 1 and 1/2 inch circles from pie crust with a biscuit cutter or glass.
Place tiny rounds of crust into mini-muffin pans.
Fill each crust with 1 teaspoon of filling mixture.
Cut 48 small stars (or other shape) from remaining pie crust (re-roll dough as necessary).
Place one small star on each tiny tart.
Sprinkle each tart with sugar.
Bake at 350F for 15 to 18 minutes.
Cool on wire rack.
Store loosely covered. (48 mini tarts)


Check back here On My Plate or on my Facebook page for the announcement of the winners on January 10, 2012. Good luck, and go love your friends! 

***GIVEAWAY NOW ENDED***CONTEST WINNERS DRAWN***

Thursday, November 10, 2011

Oh, Kay?

This post really should be just an email to a friend. She was looking for different side dishes for her Thanksgiving table, and I suggested an old favorite of Chiffonade of Brussels Sprouts. I should quickly type the recipe into an email and merrily send it off to her, but I am a food blogger. Food bloggers share recipes with lots of people, not just a chosen few. So, lucky you, you get a recap of a recipe that I originally blogged back in 2007 with the menu for a prime rib feast we devoured for Christmas.

This is an adaptable recipe. Sometimes, I add chopped onion to the bacon fat after I crisp that delicious pork. Sometimes, I feel guilty about the bacon fat and drain some of it off and add a little chicken broth for sauteing the shredded Brussels sprouts. Sometimes, I use pecans instead of hazelnuts, or skip the nuts all together. This recipe has evolved with my needs, wants, and desires and has never, ever disappointed. Some may be loyal to their Green Bean Casserole for holiday dinners, but I think I will be making and sharing Chiffonade of Brussels Sprouts for years to come.

(adapted from Food.com and originally from Diane Morgan)
2 pounds Brussels sprouts
6 slices bacon, finely diced
1/2 cup hazelnuts, chopped and roasted
1 teaspoon kosher salt
1/2 teaspoon fresh ground black pepper

Trim the stem end of the sprouts and clean to remove any yellow or spotted out leaves.
Using your food processor, shred the sprouts. (I have done this by hand with a box grater. Believe me, your knuckles will thank you for the investment in a food processor.)
Cook the bacon over medium-high heat until crisp.
Remove with a slotted spoon to a paper towel to drain. (Here is where you snack on a little...that is why I increased the bacon from the original recipe.)
Set aside.
To the bacon fat, add the shredded sprouts.
Saute until crisp-tender and bright green, about 3-5 minutes.
Add the bacon, toasted hazelnuts, salt and pepper, and toss to combine.
Taste, adjust seasonings and serve. (Serves 8)

Saturday, October 22, 2011

After School Treat

I am back to spending more time at the school these days. Last year, one situation after another caused me to be unable to accept the offers when the school was looking to fill substitute positions. So far this year, I have been able to work most of the days they have called, and I like it. I enjoy being back with the students and staff in the local halls of education. 

After a day with an elementary class, I almost always return home with amusing stories. The kids love to chat and are never afraid to share their thoughts. How a child's mind works and processes bits of information is amazing. Jr. High and High School students often prompt thoughtful discussion, digging deep in a direction that I hadn't considered taking a topic. We all learn and broaden our minds. 

We also all work up big appetites. I don't know what it is about studying all day that leaves me starving when I return home. I could eat anything that isn't nailed down, and often do. Thankfully, I have a batch of Zucchini Chocolate Chip Cookies waiting for me to tame my growling stomach. 

Shredding the last few zucchini from the garden (and freezing several portions for cakes, cookies, and bars this winter), I was happy to discover a cookie recipe to use some of the bounty. You may remember past posts when I have stated that I am not a baker and that I don't care to bake cookies, but those feelings were pushed aside as I attempted to find a way to use zucchini that wasn't baked into a cake with cream cheese frosting. Yes, I heart cream cheese frosting, but after awhile, enough is enough.

These cookies are soft and delicately spiced with cinnamon. Instead of regular chocolate chips, I chose large chocolate drops which seemed to intensify the chocolate flavor. I find the flecks of green zucchini skin (peel if you must, but I don't) to add visual interest and a bit of texture to balance the walnuts. Zucchini Chocolate Chip Cookies are the perfect after school treat On My Plate.


1 cup butter, softened
2 cups sugar
2 eggs, beaten
4 cups flour
2 teaspoons baking soda
2 teaspoons cinnamon
1 teaspoon salt
2 cups zucchini, grated
2 cups semi-sweet chocolate chips
1 1/2-2 cups walnuts, chopped

Preheat oven to 350.
Spray cookie sheets with cooking spray or line with Parchment paper.
Cream butter and sugar together until light and fluffy.
Add eggs, flour, baking soda, cinnamon, and salt into the butter mixture, gradually; mix well.
Stir in the zucchini.
Fold in walnuts and chocolate chips.
Drop by teaspoonfuls onto the cookie sheets...since these are soft cake-like cookies, allow about 2 inches between cookies for spreading in the oven.
Bake 15 to 20 minutes, or until golden. (My oven only needed 15 minutes.)
Cool 2 to 3 minutes on the baking sheets, then remove and place on wire racks to allow to cook completely.
(approx 8 dozen cookies)

Saturday, January 29, 2011

That's a Wrap

The other day someone told me that I was obsessed with scarves. This may be true. When reorganizing my closet, I had to finally move my scarves from the overflowing hanger and dedicate a separate shelf for them. This colorful, folded pile of fabric begs for me to sift through it and wrap one around myself to top off my daily wardrobe. They are fun. They are easy. Wrapping one in a certain way can help conceal my tummy. Scarves are a good wrapping.

Bacon is a good wrapping, too. Wrap a beef tenderloin with bacon and make a perfect filet mignon. Wrap asparagus spears or bundles of green beans with bacon for an extra special side dish. Wrap water chestnuts with bacon and drown in a spicy-sweet glaze for Rumaki that is lick-your-fingers-good. Wrap shrimp with bacon and and grill while brushing with a garlic butter for skewers that can bring summer to mind in the dead of winter. Bacon wrapping possibilities are endless, and I haven't met a single one that I haven't liked. (Which might explain why I need to conceal my tummy...)

It is no surprise that I was all over a salad that featured bacon-wrapped pears. Salty, crispy bacon highlights the sweetness of roasted pears so well.  I just love a sweet and salty combo, don't you? Toss in the earthiness of pecans with fresh greens and drizzle with a light, savory dressing and you have wrapped up an incredible salad. Roasted Bacon-Wrapped Pears with Greens and Mustard Dressing is a beautiful (and impressive...but oh so easy!) starter to a meal, but is hearty enough to be the meal itself.

That's a wrap On My Plate.


12 slices bacon
3 large pears, quartered
6 cups mixed salad greens
2/3 cup pecans, toasted
2/3 cup Parmesan cheese, shaved
Dressing:
2 tablespoons honey or agave nectar
2 tablespoons Dijon mustard
2 tablespoons white wine vinegar (or apple cider vinegar)
2-3 tablespoons olive oil

Preheat oven to 350.
Mustard Dressing: 
Whisk all dressing ingredients together. Set aside for flavors to meld while preparing the rest of the salad.
Meanwhile, between layers of paper toweling on a plate, heat bacon in a microwave until partially cooked. It should still be "bendy" and not crispy. (I hesitate to give exact cook times, because all microwaves cook differently.)
Wrap one slice of bacon around each pear quarter, and secure with a wooden pick. 
Place pear quarters on a wire rack over a jelly-roll pan.
Bake bacon-wrapped pears for 10 minutes, or until fruit is juicy and bacon is crispy.
Arrange salad greens on 4 serving plates, and sprinkle evenly with pecans and Parmesan cheese. 
Place 3 pear quarters on each salad.
Drizzle with Mustard Dressing before serving. (Serves 4)

Sunday, December 26, 2010

Sugar Hangover

How many of you are in a sugar hangover? Were there too many sweets and treats this Christmas season? Christmas Day may have passed, but there is no reason that the sugar overload has to stop.

Last year, I made some Butter Pecan Fudge that was *fabulous*. I had hoped to share it with you here, but it was gone before I could snap a photo. This year, I have managed to save a piece, and even though most of us are groaning that we can't handle another sugar cookie, peppermint stick, or chocolate covered peanut, you really should find an excuse to make a pan of this. I know it is December 26, but who says that the sugar high must end?


1/2 cup butter
1/2 cup heavy cream
1/2 cup sugar
1/2 cup brown sugar, packed
1/8 teaspoon salt
1 cup chopped pecans
1 teaspoon vanilla extract
2 cups powdered sugar

Line an 8-inch baking pan with foil and coat with cooking spray.
In a large saucepan, bring the butter, heavy cream, granulated sugar, brown sugar, and salt to a boil over medium heat, stirring frequently.
Allow to boil for 5 minutes, stirring constantly, then remove the pan from the heat.
Stir in the pecans and vanilla.
Sift in the powdered sugar, and stir until smooth and well combined. (I REALLY do recommend the sifting. It eliminates any lumps in the powdered sugar and makes the stirring that much easier.)
Spread the mixture into prepared baking dish.
Allow to cool to room temperature.
Lift entire "block" of fudge from the baking pan to cut into 1-inch cubes. (This is where the foil comes in handy and makes cutting perfect little cubes easier.)
Store in air-tight container...if there is any left.

Friday, December 10, 2010

Fridge Friday, Episode 15

I have given you 14 peeks into my fridge for Fridge Friday and today is number 15.


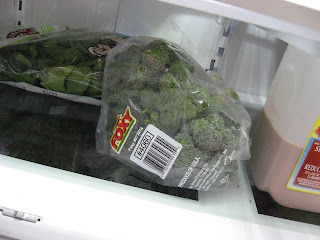
Someone asked if I clean the fridge before I take the photos. Usually, no. If I think about it, I will do a sweep of old leftovers and things past their prime on Wednesday or Thursday evening when I am cleaning up and washing dishes after dinner. Otherwise, I usually just throw open the doors (LOVE the French doors on this new fridge...enough that I wanted to replace the "O" in "LOVE" with a heart, but didn't know how to do that) and snap a pic. Today, I did pull the broccoli from the crisper drawer before I clicked the shutter. Otherwise, you wouldn't have been able to see the main ingredient for today's recipe.


Broccoli with Buttered Pecans is a fabulous way to dress up a plain old vegetable. Let's face it; many won't touch cooked broccoli without cheese sauce. In our house, Hubs has given his seal of approval for Pureed Broccoli, but our favorite preparation would be roasted with garlic and finished with a squeeze of lemon. However, you don't have to be Paula Deen to quickly saute steamed broccoli in butter with the nutty benefit of pecans. After all, it isn't *that much* butter. Just a pat. Just enough to balance with the crisp earthy flavors of the fresh, green broccoli. And, PECANS. Who doesn't like pecans? Well, maybe those with nut allergies. Sorry. Maybe then cheese sauce might be better. But, as for me, I won't turn down Broccoli with Buttered Pecans On My Plate.


1 head of broccoli, cut into florets
1 tablespoon butter
3 tablespoons chopped pecans
1/4 teaspoon kosher salt
1/4 teaspoon fresh cracked black pepper

Arrange broccoli in a steamer basket over boiling water.
Cover and steam 4 minutes, or until tender-crisp.
Plunge the broccoli into an ice bath to stop the cooking; drain well.
Meanwhile, heat a large non-stick skillet on high.
Add the pecans and reduce heat to medium. 
Stir or shake the pan for about 5 minutes until the nuts are toasted and fragrant. (Watch carefully; the oils in the nuts burn easily.)
Remove pecans from skillet and set aside.
Melt butter in same large non-stick skillet over medium heat.
Add broccoli, and pecans.
Season with salt and pepper.
Saute lightly, stirring gently, 2 to 3 minutes or until heated through. (Serves 4)

Wednesday, December 08, 2010

Turning Into a Pumpkin

It is late and I am about ready to turn into a pumpkin, but after reading about Pumpkin Gingerbread Trifle over at Jeanne Eats World (Go ahead. Click over there. Did you see it? Don't those layers sound absolutely delicious?), I can't get my own Pumpkin Gingerbread with Warm Caramel Sauce out of my mind. I came to the blog to refresh my memory of the ingredients and discovered that I HADN'T POSTED THE RECIPE. Sacrilege. It is too good not to share.

This, just like Cranberry Dessert Cake with Warm Butter Sauce, was snagged from one of those little Pillsbury cookbooks sold at the checkout stands of the grocery store. I think it might have even been the cover photo. (Theirs was perfectly topped with a scoop of ice cream because, unlike me, they used special "food photo techniques" to keep it from sliding off.) The photo and recipe were oh so tempting, and I just couldn't resist. Pumpkin Gingerbread with Warm Caramel Sauce quickly became one of my fall and winter staples. It is truly old-fashioned, comfort-food dessert at its finest.


2 1/4 cups flour
1/2 cup sugar
2/3 cup butter
3/4 cup pecans, coarsely chopped
1 teaspoon baking soda
1 1/2 teaspoons ginger
1/2 teaspoon cinnamon
1/4 teaspoon salt
1/4 teaspoon cloves
3/4 cup buttermilk
1/2 cup molasses
1/2 cup canned pumpkin
1 egg

Preheat oven to 350F.
Combine flour and sugar.
Mix in butter with a pastry blender until mixture resembles fine crumbs.
In a 9-inch square baking pan, place 1 3/4 cups of the mixture and press evenly along the bottom to form a crust.
Add pecans, baking soda, ginger, cinnamon, salt, and cloves to crumb mixture and stir well.
Add buttermilk, molasses, pumpkin, and egg.
Pour batter on top of the crust in the baking pan.
Bake for 40-50 minutes, or until a toothpick inserted in the center comes out clean.


1/2 cup butter
1 1/4 cups light brown sugar
2 tablespoons corn syrup
1/2 cup heavy cream

Melt butter in a heavy saucepan.
Stir in brown sugar and corn syrup.
Stirring constantly, bring mixture to a boil, and cook for 1 minute or until sugar dissolves.
Gradually add cream and return to a boil.
Remove from heat.

To serve, top each serving with scoop of vanilla ice cream and spoon sauce over warm gingerbread. (Serves 9-12)

Saturday, August 28, 2010

Muffin Top

I tried on my jeans today for the first time in a couple of months. I have been enjoying the summer in shorts, capris, skirts, and sundresses. Jeans have not been a part of my wardrobe. Maybe, they should have been. Maybe, I should have forced my thighs into the unforgiving denim a few times just as a means of checks and balances. I really wasn't happy as I sucked in my flab to zip up my favorite pair of jeans and revealed a blubbery muffin top. Gross.

The only muffin top that I want is on a real muffin, like a Spiced Zucchini and Walnut Muffin. Fragrant with cinnamon, dense with shredded zucchini, packed with the crunch of walnuts, these muffins are anything but gross. But, if I want to fit back into my jeans, I might have to pass on the Spiced Zucchini and Walnut Muffins On My Plate for awhile.


3 eggs, well beaten
1 cup Canola oil
2 cups sugar
2 cups grated zucchini (peel if you must, but I don't)
3 teaspoons vanilla
3 cups flour
1 teaspoon salt
1/4 teaspoon baking powder
1 teaspoon baking soda
3/4 teaspoon nutmeg
3 teaspoons cinnamon
1 cup chopped walnuts

Preheat oven to 325.
Mix first 5 ingredients.
Sift together rest of ingredients.
Add to the first mixture.
Coat 24 muffin tins with non-stick cooking spray.
Divide batter evenly among the muffin cups. (I use an ice cream scoop.)
Bake for 35-45 minutes, or until top springs back with light touch and pick comes out clean.  (24 muffins) 

NOT Fridge Friday

Yesterday, I missed Fridge Friday. I am going to blame it on the fact that I no longer have a fridge in my kitchen. Yes. That's right. I don't have a fridge...sort of.

I do have a fridge...but, it is in the basement. For the past week, every time I have needed a chilled item, I have had to go out into the back entryway and down some steep, old-house basement stairs...and then back up again with whatever I needed...and then back down again for whatever I forgot...wash, rinse, repeat as necessary.

You see, back in May (or so, I don't exactly remember), the fridge that was originally in the basement died. Everything (cheeses, butter, produce) that I had hoarded stashed there had to be transferred to the upstairs fridge. At that time, it was decided that we wouldn't just purchase another plain, utilitarian, white refrigerator for the basement. We would temporarily get by as a one fridge household, and when extra funds were available, we would invest in the stainless-steel, french-door, freezer-on-the-bottom, ice-and-water in the door baby that I had been dreaming about forever.

My dream came true a month ago...sort of. We purchased an awesome stainless-steel, french-door, freezer-on-the-bottom, ice-and-water in the door GE Profile (to match my GE Profile stainless, gas range...and that purchase is another story entirely). I was in heaven...except the store didn't have any in stock. They were on order. We were promised that within 2 weeks, the beautiful, shiny cold box could be delivered to my home. My Plain Jane fridge was moved from the kitchen to the dungeon basement in anticipation of the delivery of this new purchase. (And my daily stair running workouts began.) Fast forward to today, and I am STILL waiting. The refrigerator was supposed to be transferred to an area sister store for final delivery. However, nobody knows where it is. Nobody can tell me when it will be delivered. Nobody knows how close to going postal this makes me. 

So...I missed Fridge Friday because I don't have a fridge, but I do have zucchini. Oh yes, it is that time of year again. Gardens are overflowing with the green squash. How about a Chocolate Zucchini Snack Cake to ease the pain of my missing fridge? This is a recipe that I have seriously been making for over 20 years. It was in a cookbook that I received as a shower gift before Hubs and I were married. I love the addition of cinnamon and cloves. Chocolate chips and walnuts on top make frosting totally optional (and I usually don't bother). The cake is dense and rich and makes use of the abundant zucchini without any refrigeration needed. If I can't have my new fridge, at least I can have Chocolate Zucchini Snack Cake On My Plate.


1/2 cup butter, softened
1/2 cup Canola oil
1 3/4 cups sugar
2 eggs
1 teaspoon vanilla
1/2 cup buttermilk
2 1/2 cups flour
4 tablespoons cocoa
1/2 teaspoon baking powder
1 teaspoon baking soda
1/2 teaspoon salt
1/2 teaspoon cinnamon
1/2 teaspoon cloves
2 cups zucchini, grated (I leave the skin on; peel if you feel the need.)
chocolate chips
chopped walnuts


Preheat oven to 325.
Cream butter, oil, and sugar. 
Add eggs, vanilla, and buttermilk. 
Stir in dry ingredients and beat well.
Stir in zucchini.
Pour into a 9x13 pan that has been coated with non-stick cooking spray.
Sprinkle chocolate chips and nuts over the top.
Bake for 45 to 60 minutes, or until pick inserted in center comes out clean. (beware of melty chocolate chips on your testing pick)

REMEMBER: The recipes are now printable. Just click on the title to open the printable page. I hope to edit the archives to make all recipes printable in the future.

Saturday, March 28, 2009

Going Bananas

It's beautiful. The sun is shining on a 70+ degree day. Then, the clouds roll in and a thunderstorm builds; tornadoes loom; the skies are angry as the temperature drops and the weather changes. Hours later, Mother Nature turns the rains to ice, and the cold winds bring the blinding, blowing snow of a blizzard which closes interstates, schools, and offices. However just a day later, winter weather warnings once again give way to sun, clear skies, and spring temperatures...only to have the threat of more snow on the horizon of the forecast.

Yes, that is a week of weather in south central South Dakota. It is bananas. In spite of the clean living of most of our residents, we are at the mercy of what seems to be a PMSing Mother Nature. Well, I know what I want when PMS comes knocking at my door: cake. Roasted Banana Cake with Brown Butter Frosting has the best frosting ever, and we all know that frosting MAKES a cake. Let's bake some up as an offering to crazy old Mother Nature. Let's hope that Roasted Banana Cake On My Plate will save us from going bananas with the ever changing weather.

Roasted Banana Cake with Browned Butter Frosting
2 cups sliced ripe banana (about 3 medium)
1/3 cup packed dark brown sugar
1 tablespoon butter, chilled and cut into small pieces
2 1/4 cups flour
3/4 teaspoon baking soda
1/2 teaspoon baking powder
1/4 cup buttermilk
1 teaspoon vanilla extract
1/2 cup butter, softened
1 1/4 cups granulated sugar
2 large eggs
Baking spray with flour
Frosting:
1/4 cup butter
2 cups powdered sugar
1/3 cup cream cheese, softened
1 teaspoon vanilla extract
1/4 cup chopped pecans, toasted

Preheat oven to 400°.
Combine banana, brown sugar, and 1 tablespoon butter in an 8-inch square baking dish. Bake at 400° for 35 minutes, stirring after 17 minutes. Cool slightly.
Reduce the oven temperature to 375°.
Combine 2 1/4 cups flour, soda, and baking powder in a medium bowl.
Combine banana mixture, buttermilk, and 1 teaspoon vanilla in another medium bowl.
Place 1/2 cup butter and granulated sugar in a large bowl; beat with a mixer at medium speed until well blended. Add eggs; mix well.
Add flour mixture to sugar mixture alternating with banana mixture, beginning and ending with flour mixture.
Pour batter into a 13 x 9–inch baking pan coated with baking spray.
Bake at 375° for 20 minutes or until a wooden pick inserted in center comes out clean. Cool completely in pan on a wire rack.
To prepare frosting, melt 1/4 cup butter in a small saucepan over medium heat; cook 4 minutes or until lightly browned. Cool slightly.
Combine browned butter, powdered sugar, cream cheese, and 1 teaspoon vanilla in a medium bowl; beat with a mixer until smooth.
Spread frosting over cooled cake. Sprinkle with pecans.
Related Posts with Thumbnails